
Need all the information on how Relics work in Invokers: Titan Legacy? Equip yourself for battle with this comprehensive Relics guide for Invokers: Titan Legacy!
Invokers can increase both their primary and secondary Stats by equipping Relics.
Relics come in 8 different kinds: Weapons, Shields, Helmets, Pauldrons, Gauntlets, Chestplates, Helmets, Belts and Boots. Invokers can equip a full set of 8 Relics.
Each Relic has a Main Stat and a set of up to 4 potential Substats.
Some Relics have set Main Stats, while others can vary.
| Main Stats | |||||||||||||||||
| Potential Stats | Relic Name | ATK+ | DEF+ | HP+ | ATK% | DEF% | HP% | Crit Rate | Crit DMG | ACC | RES | Combo SPD | Skill SPD | Skill RECOV | Mana Gen | Instinct | Move SPD |
| 1 | Weapon | ✓ | |||||||||||||||
| 1 | Shield | ✓ | |||||||||||||||
| 1 | Helmet | ✓ | |||||||||||||||
| 3 | Pauldrons | ✓ | ✓ | ✓ | |||||||||||||
| 9 | Gauntlets | ✓ | ✓ | ✓ | ✓ | ✓ | ✓ | ✓ | ✓ | ✓ | |||||||
| 9 | Chestplate | ✓ | ✓ | ✓ | ✓ | ✓ | ✓ | ✓ | ✓ | ✓ | |||||||
| 9 | Belt | ✓ | ✓ | ✓ | ✓ | ✓ | ✓ | ✓ | ✓ | ||||||||
| 9 | Boots | ✓ | ✓ | ✓ | ✓ | ✓ | ✓ | ✓ | ✓ |
| Sub Stats | |||||||||||||||||
| Potential Stats | Relic Name | ATK+ | DEF+ | HP+ | ATK% | DEF% | HP% | Crit Rate | Crit DMG | ACC | RES | Combo SPD | Skill SPD | Skill RECOV | Mana Gen | Instinct | Move SPD |
| 11 | Weapon | ✓ | ✓ | ✓ | ✓ | ✓ | ✓ | ✓ | ✓ | ✓ | ✓ | ✓ | |||||
| 11 | Shield | ✓ | ✓ | ✓ | ✓ | ✓ | ✓ | ✓ | ✓ | ✓ | ✓ | ✓ | |||||
| 11 | Helmet | ✓ | ✓ | ✓ | ✓ | ✓ | ✓ | ✓ | ✓ | ✓ | ✓ | ✓ | |||||
| 13 | Pauldrons | ✓ | ✓ | ✓ | ✓ | ✓ | ✓ | ✓ | ✓ | ✓ | ✓ | ✓ | ✓ | ✓ | |||
| 13 | Gauntlets | ✓ | ✓ | ✓ | ✓ | ✓ | ✓ | ✓ | ✓ | ✓ | ✓ | ✓ | ✓ | ✓ | |||
| 13 | Chestplate | ✓ | ✓ | ✓ | ✓ | ✓ | ✓ | ✓ | ✓ | ✓ | ✓ | ✓ | ✓ | ✓ | |||
| 13 | Belt | ✓ | ✓ | ✓ | ✓ | ✓ | ✓ | ✓ | ✓ | ✓ | ✓ | ✓ | ✓ | ✓ | |||
| 13 | Boots | ✓ | ✓ | ✓ | ✓ | ✓ | ✓ | ✓ | ✓ | ✓ | ✓ | ✓ | ✓ | ✓ |
Along with the bonuses that a Relic’s Primary and Substats provide, each Relic belongs to a specific Set.

Sets
Each Relic belongs to a designated Relic Set.
Equip enough Relics from a particular set and you’ll gain their Set Bonus.
3 Relics unlocks an initial Set Bonus
5 Relics unlocks an additional Set Bonus
Set Bonuses from the same Relic Set are additive.
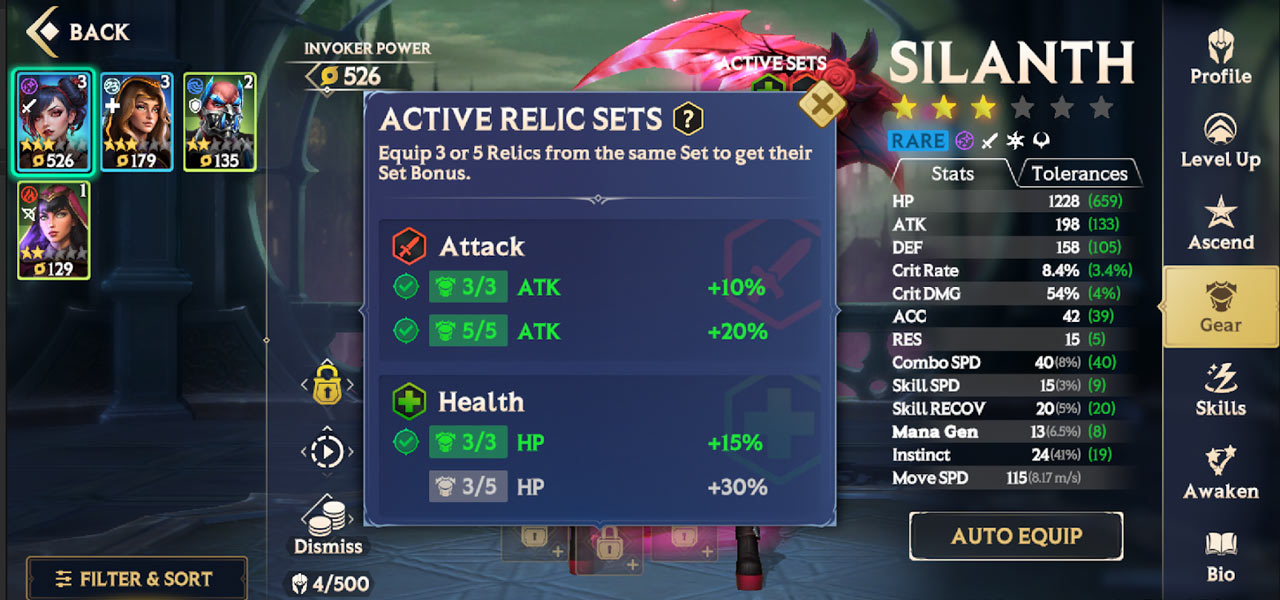
You can mix a 3-piece Set Bonus with a 5-piece Set Bonus from two different Relic Sets.
You cannot gain two 3 piece Set Bonuses from the same Relic Set.
Rank & Rarity
A Relic’s strength is heavily dependent on their Rank and Rarity.
A Relic’s Rarity determines the number of Substats it already has before it’s upgraded. These Substats will then be upgraded as you improve the Relic, rather than being unlocked.
Relics of a certain Rarity have the following Substats are their base Level:
Common: 0 Substats
Uncommons: 1 Substat
Rare: 2 Substats
Epic: 3 Substats
Legendary: 4 Substats
A Relic’s Rank determines the value of its Main Stat and Substats. The higher Rank a Relic is, the greater the value of its Stats.
A Relic’s Rank is determined by the number of ★s it has – similar to Invokers.
You cannot increase a Relic’s Rarity or Rank – you can only increase its Level.
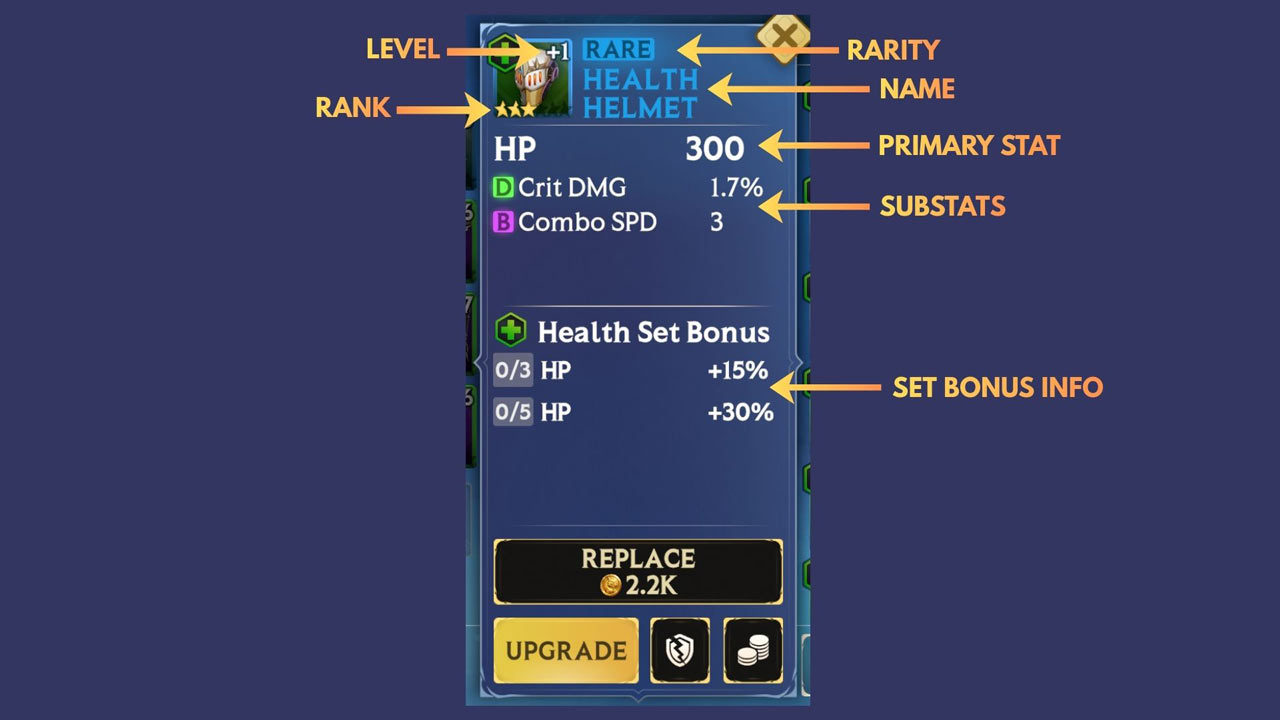
If you quickly want to tell if a Relic is worth equipping to one of your Invokers, you can quickly check all of its properties.
Equipping Relics
To equip Relics, head to your Invoker Collection and select the Invoker you want to equip.
If you want the game to decide the best equipment to equip, hit the Auto Equip button. This will select Relics on a variety of factions like:
Your Invoker’s Class
Their current Stats
What Set Bonuses are currently available
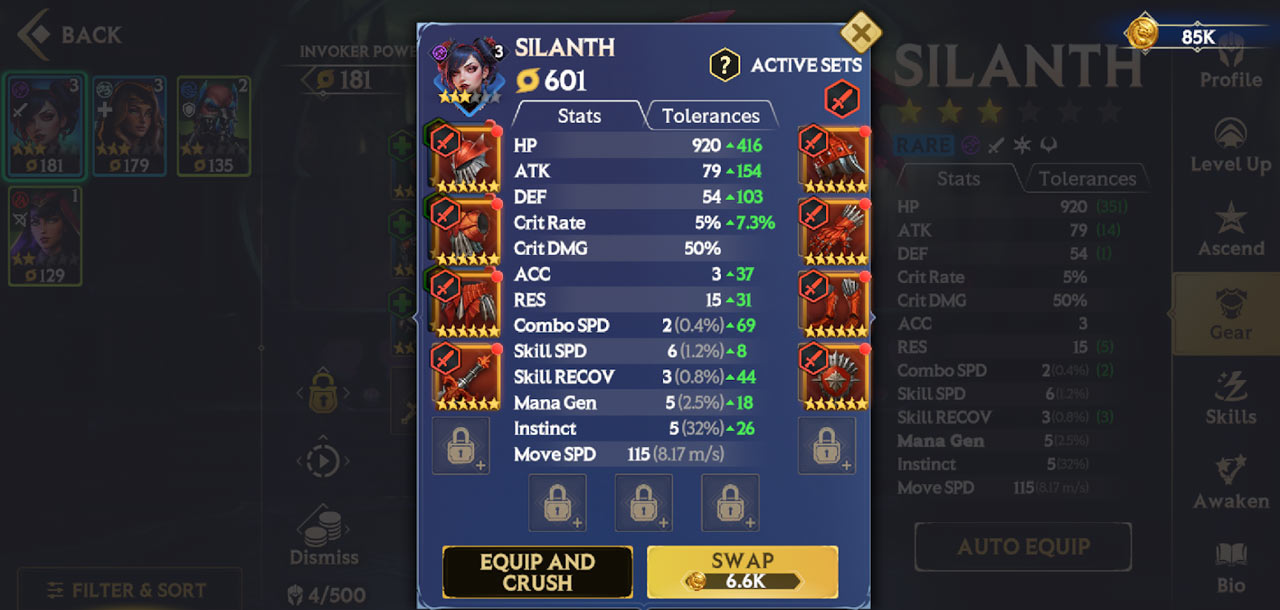
You will see a preview of your Stat changes from the suggested equipment. To accept this Relic selection, hit the Swap button. Swapping Relics requires Gold.
To swap out existing Relics and turn the old ones in Memorium, hit the Equip and Crush button.
The Gear Room
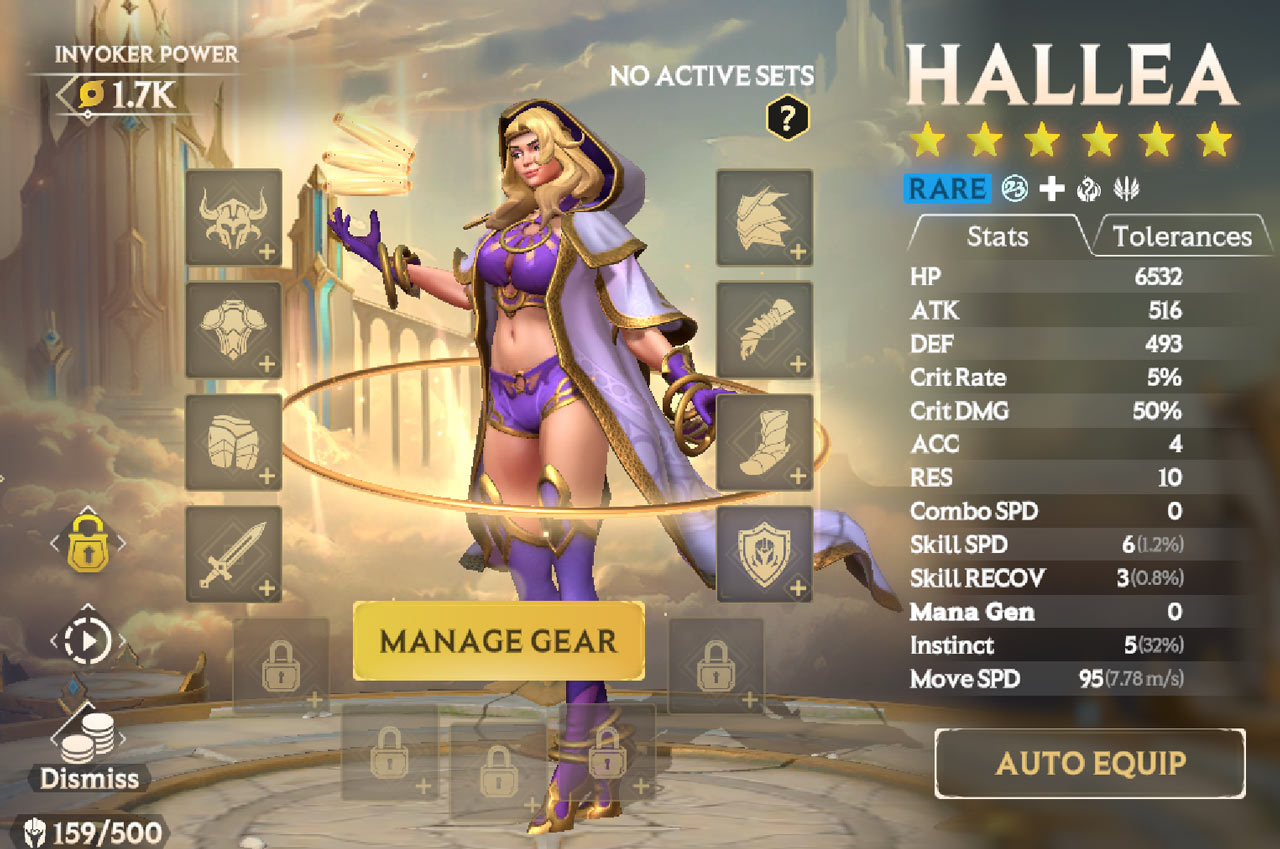
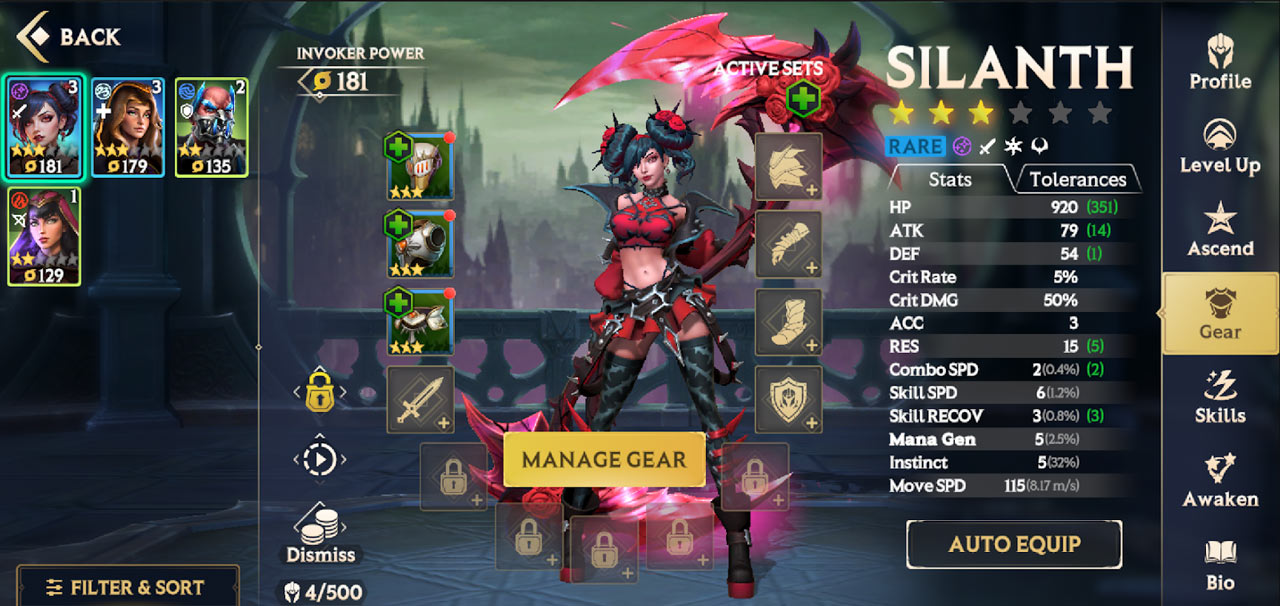
If you want more precise control over the Relics you wish to equip, select any of the empty Relic slots on your Invoker or hit the Manage Gear option. This will open the Gear Room.

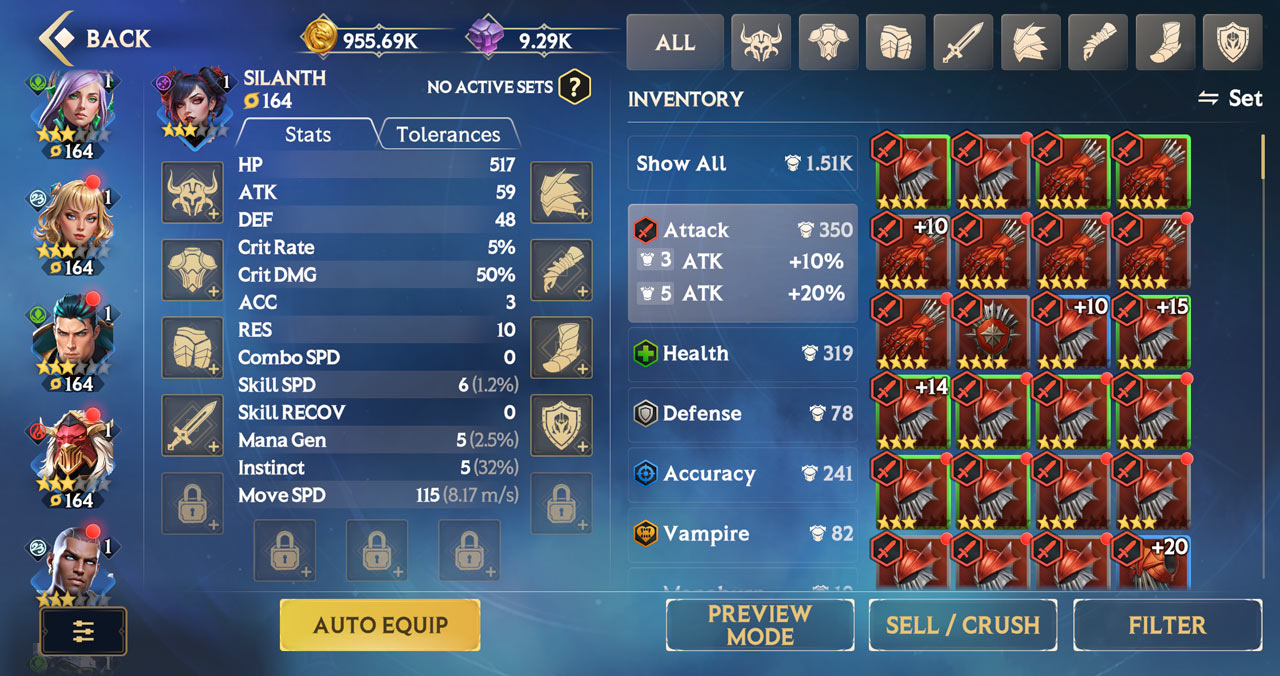
In the Gear Room’s Inventory, you can:
Scroll through your entire Relic collection
Preview specific Relics before you equip them
Upgrade your Relics
Sell or crush your Relics
Filter your Collection to find specific Relics
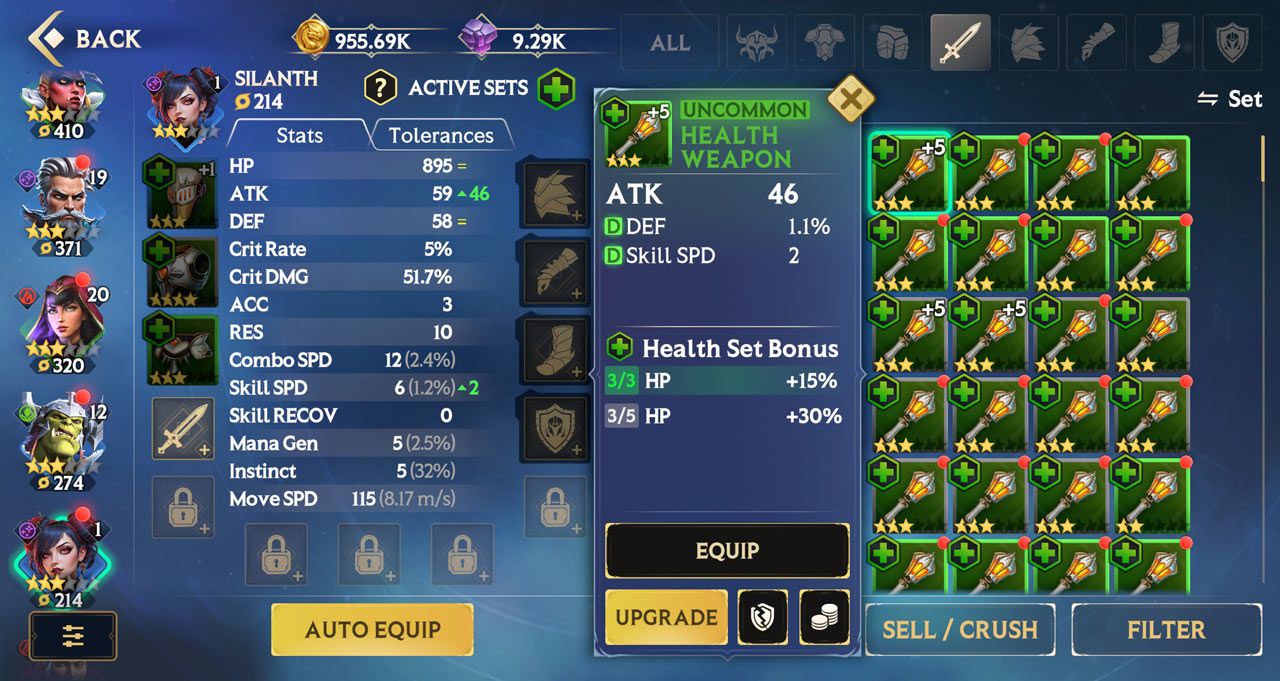
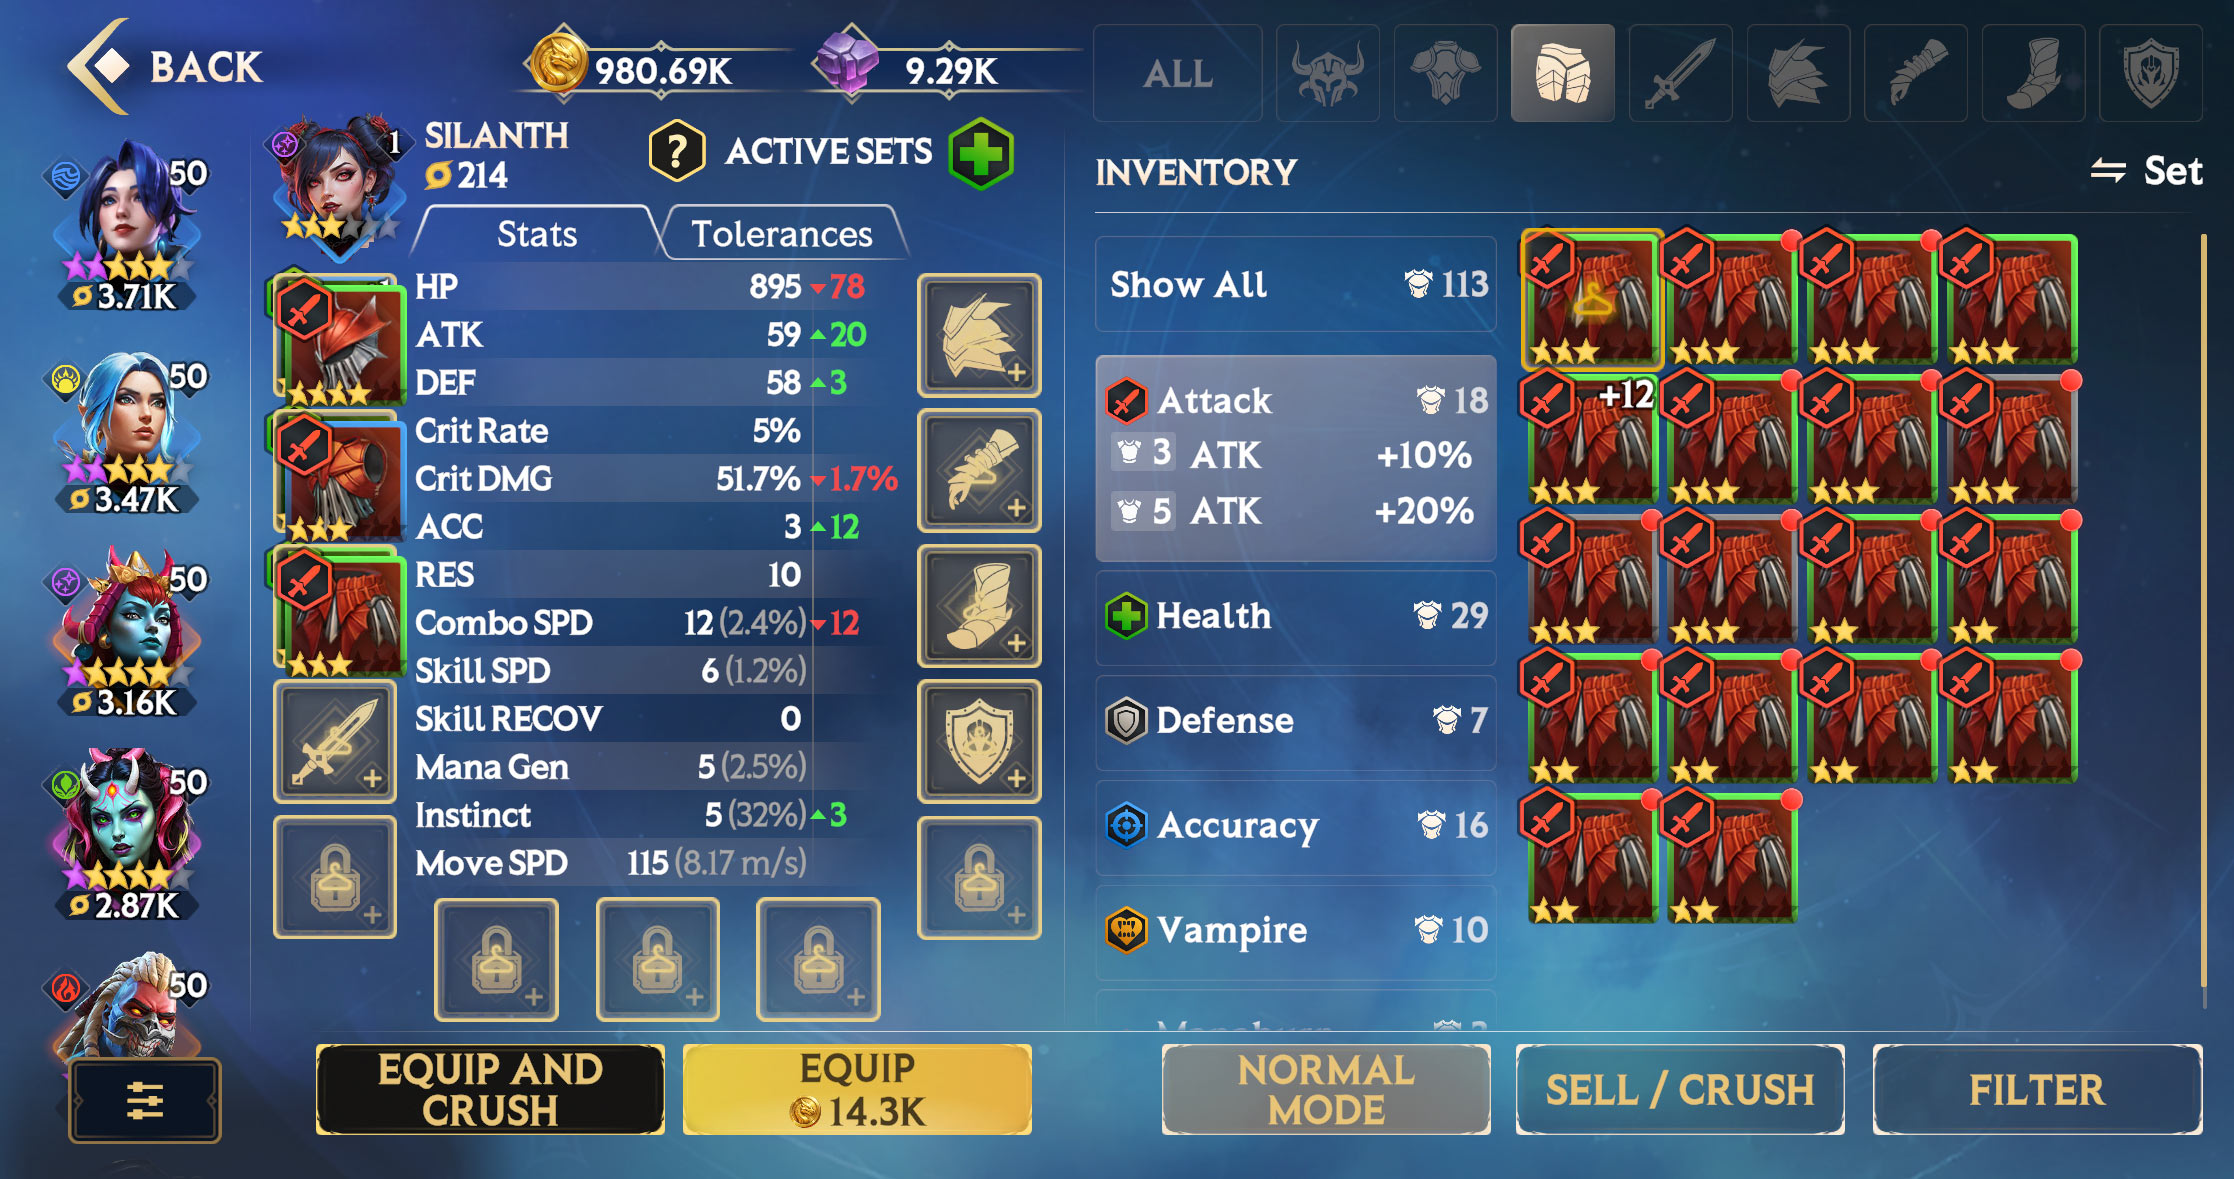
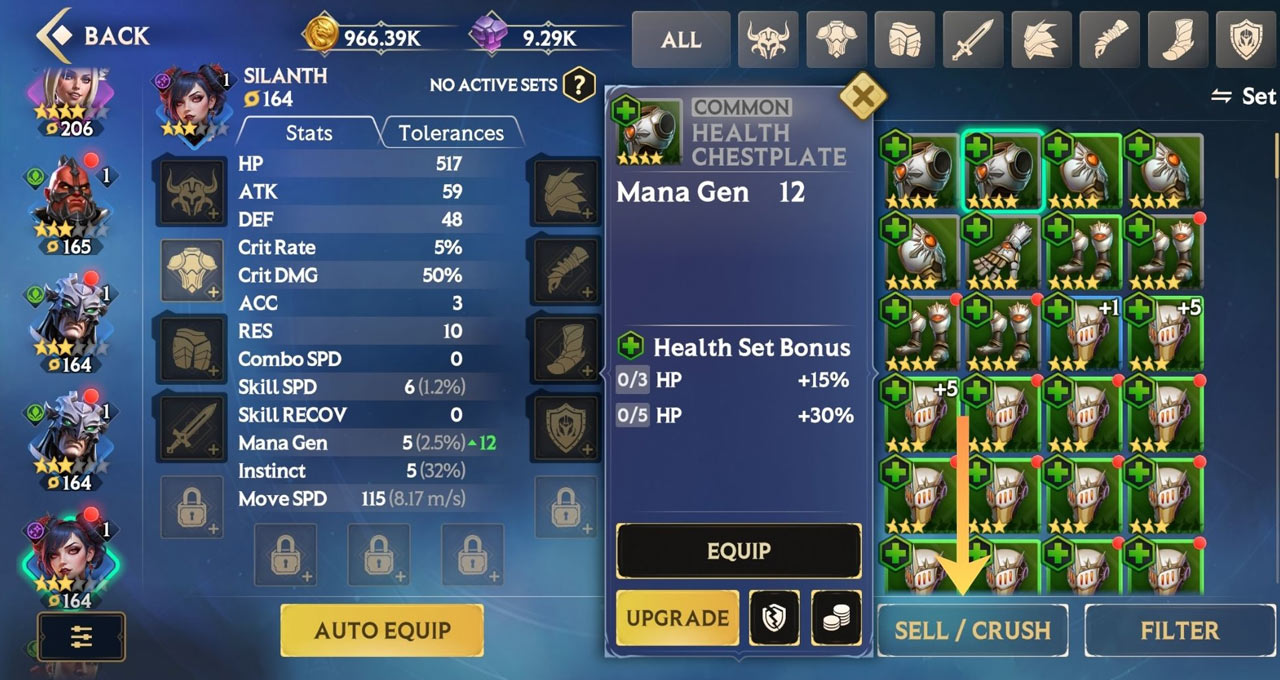
To equip a Relic to an empty Slot, tap on the Relic you wish to equip from your Inventory on the right-hand side.
In the below example, we’re equipping a Weapon to Silanth. You will receive a preview of the Stats it will increase – if you are happy with the Stats, hit the Equip button to equip it to your Invoker.
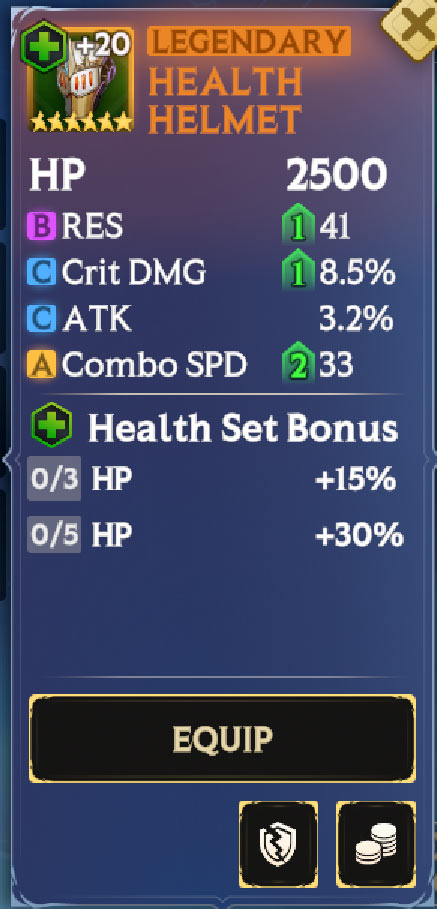
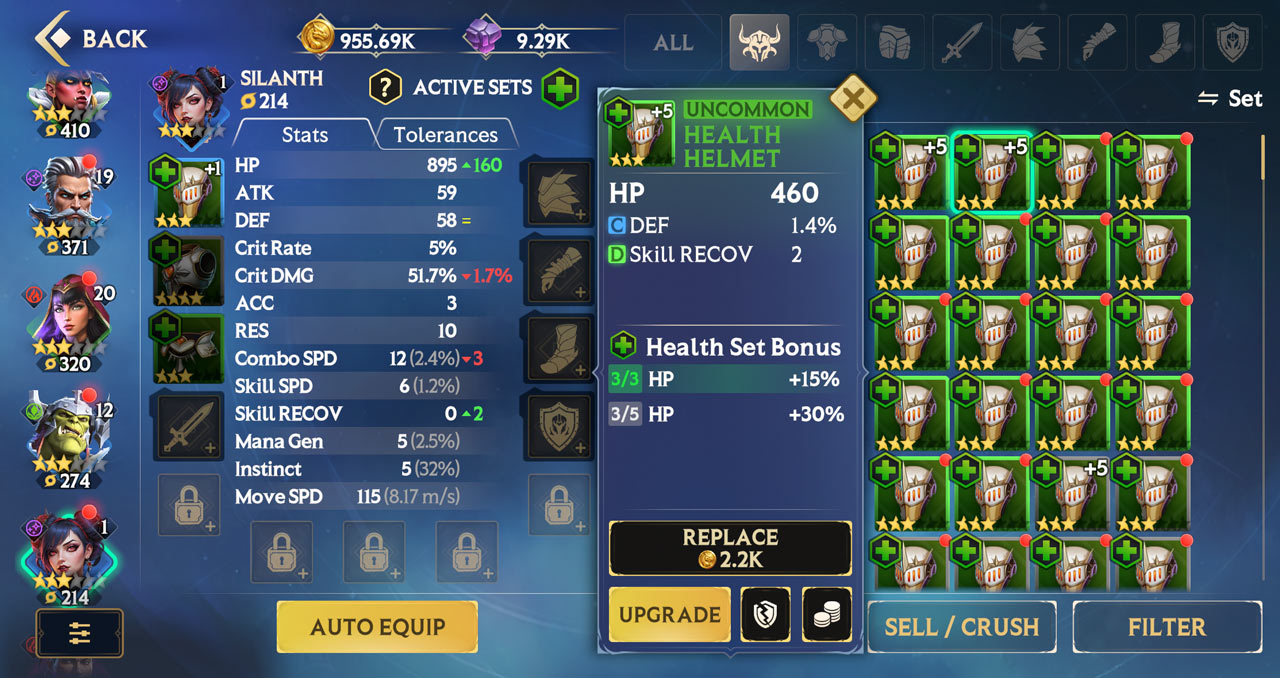
To replace Silanth’s currently equipped Health Helmet with an Attack one, we select the Attack Helmet we want from the right-hand side.
The same comparison screen appears, showing which stats would increase or decrease by changing Relics.
If you want to equip this new Relic, hit the Replace button.
Preview Mode
If you want to preview a completely new Relic loadout before putting any Gold down, you can use Preview Mode.
In Preview Mode, you will “try on” any Relics over your current loadout..
Once you’ve selected Preview Mode on the bottom-right of the Inventory screen, select any of the Relics you wish to preview and then select Preview.
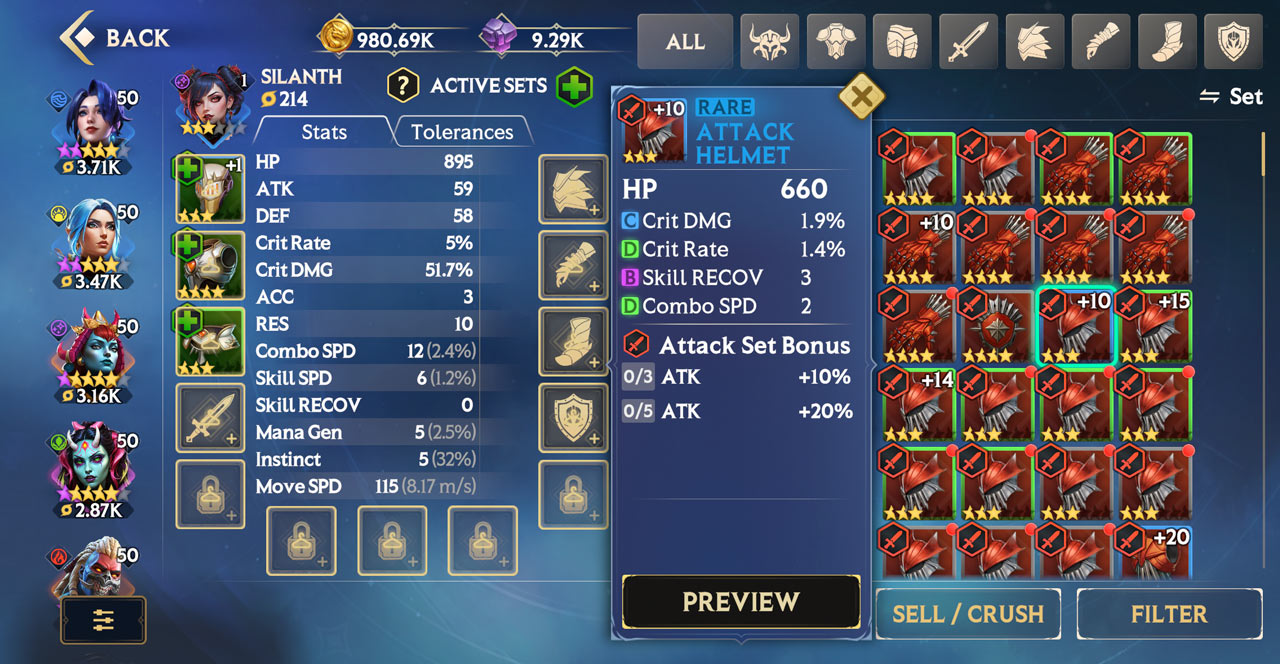
The previewed item will then be overlaid on top of your current Relics – showing any stat changes.
Relics that are being previewed are indicated by the clothes hanger icon on the right-hand side of the Gear Room.
If you are happy with this new Relic selection, hit the Equip button, pay the Gold cost, and enjoy!
Like with the Auto Equip feature, you can also dispose of the replaced Relics by selecting the Equip and Crush option. This is useful for when you are clearing out old Relics.
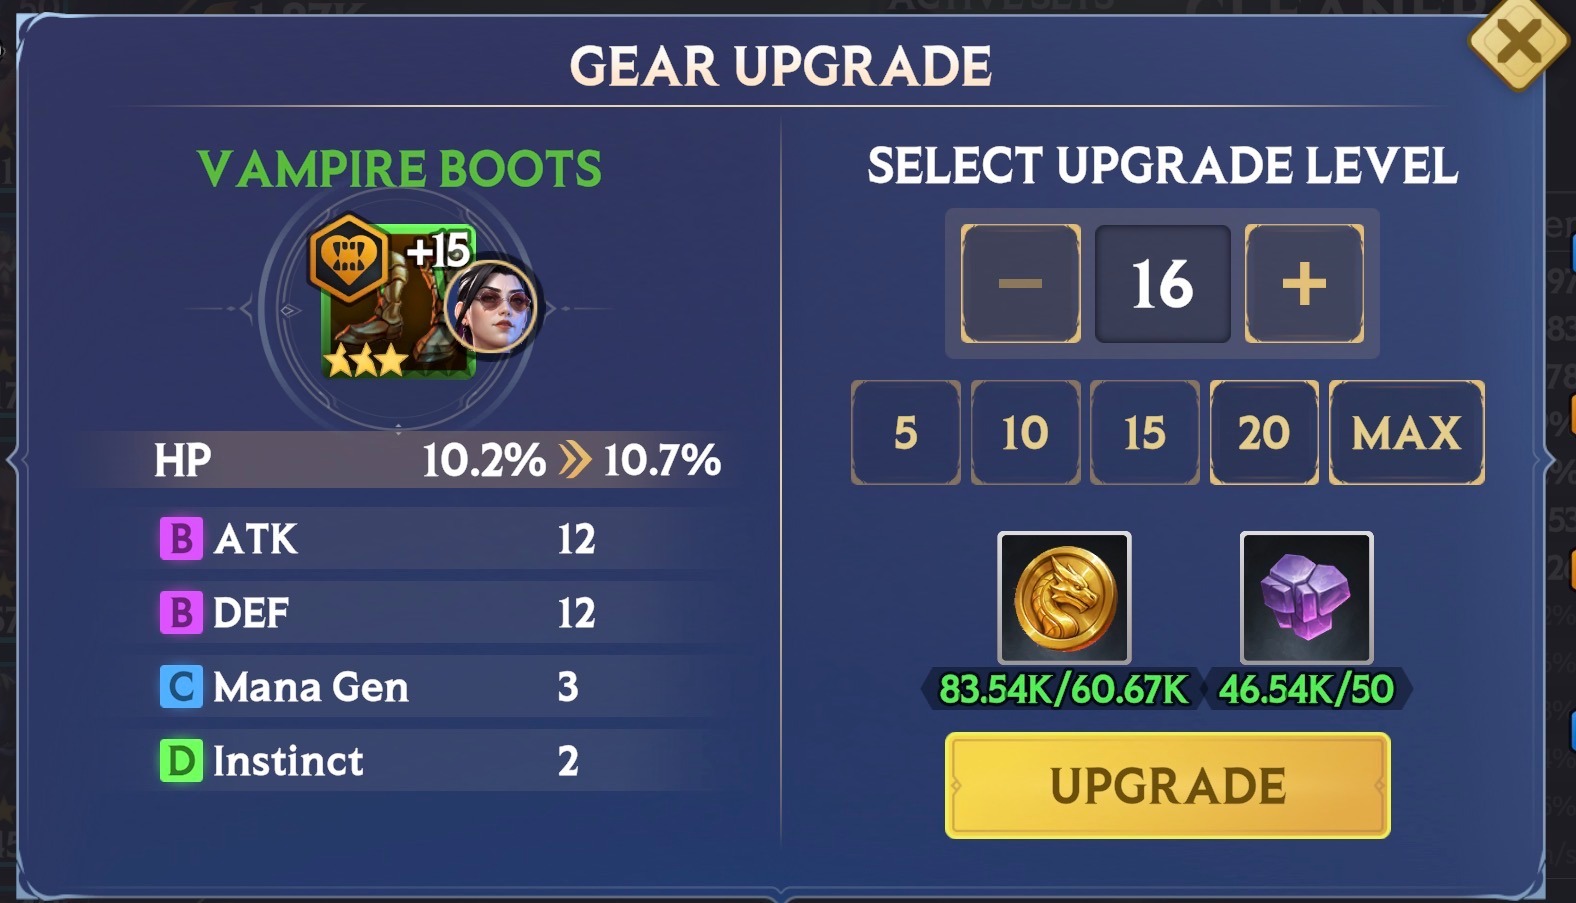
Upgrading Relics
Every Relic starts unupgraded, with a lowly Main Stat and between 1 to 4 Substats, depending on the Relic’s Rarity.
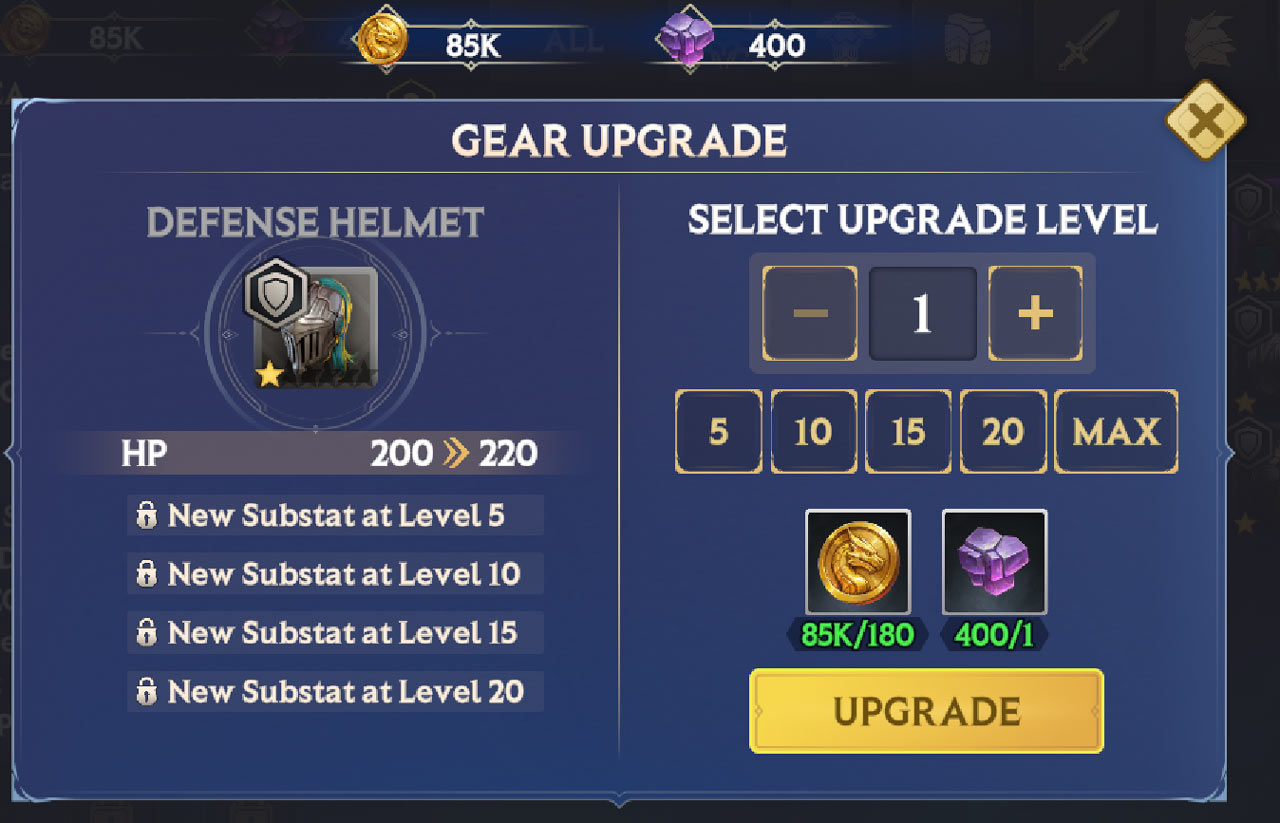
Upgrading will increase a Relic’s strength. Relics can be upgraded all the way to Level 20.
When you upgrade Relics, you:
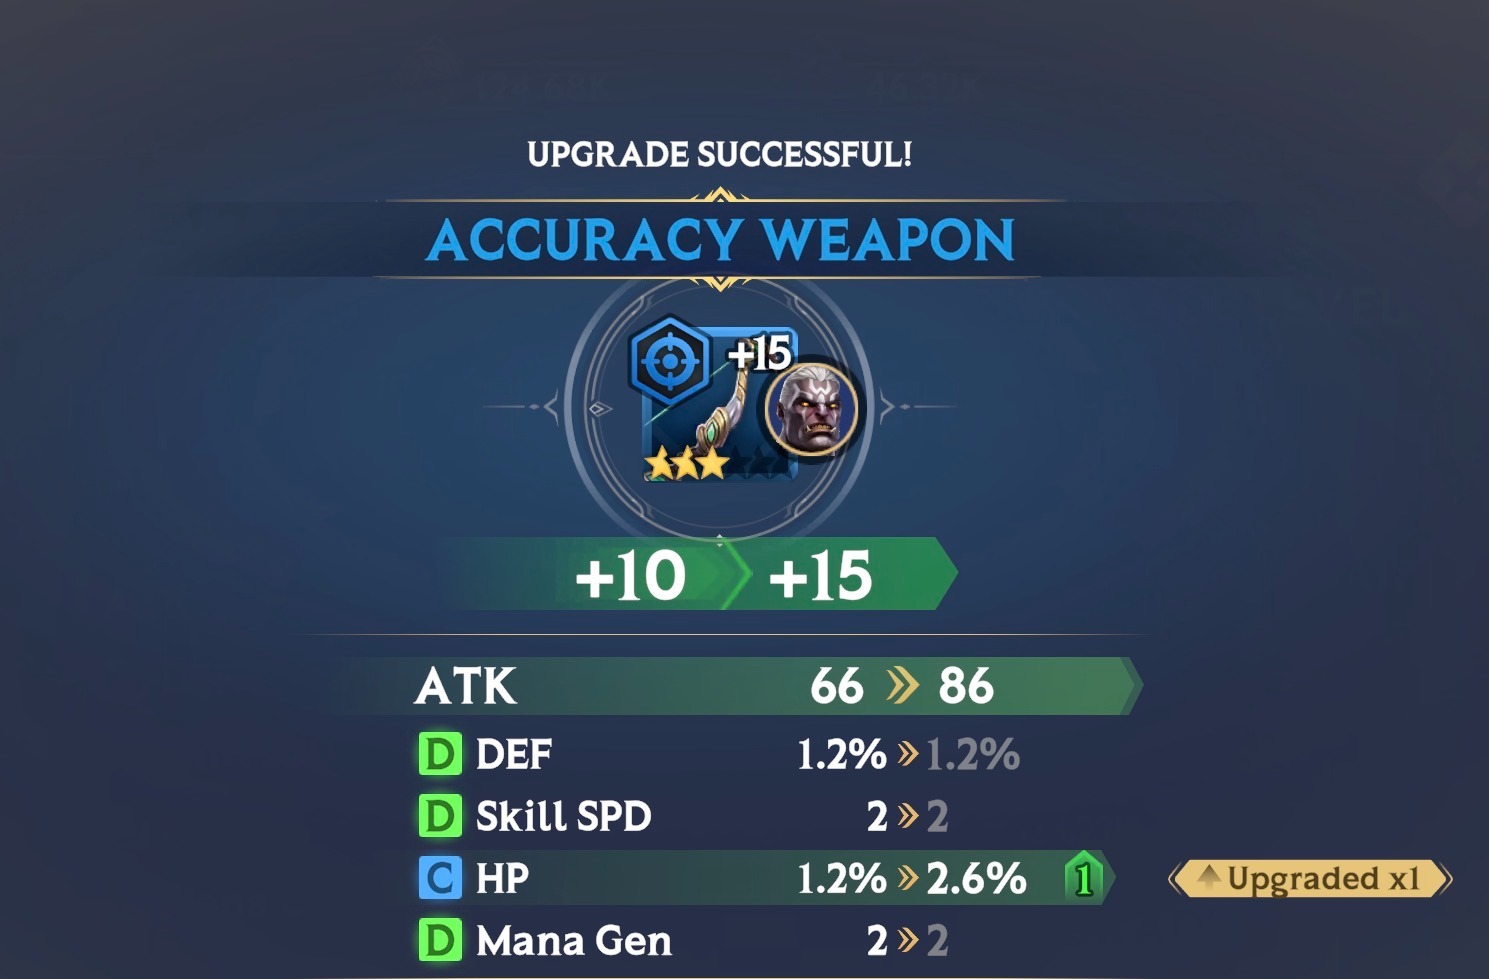
Increase the value of its Main Stat
Unlock a new Substat at Levels 5, 10 ,15, and 20 (depending on the Relic’s Rarity) or upgrade an existing Substat
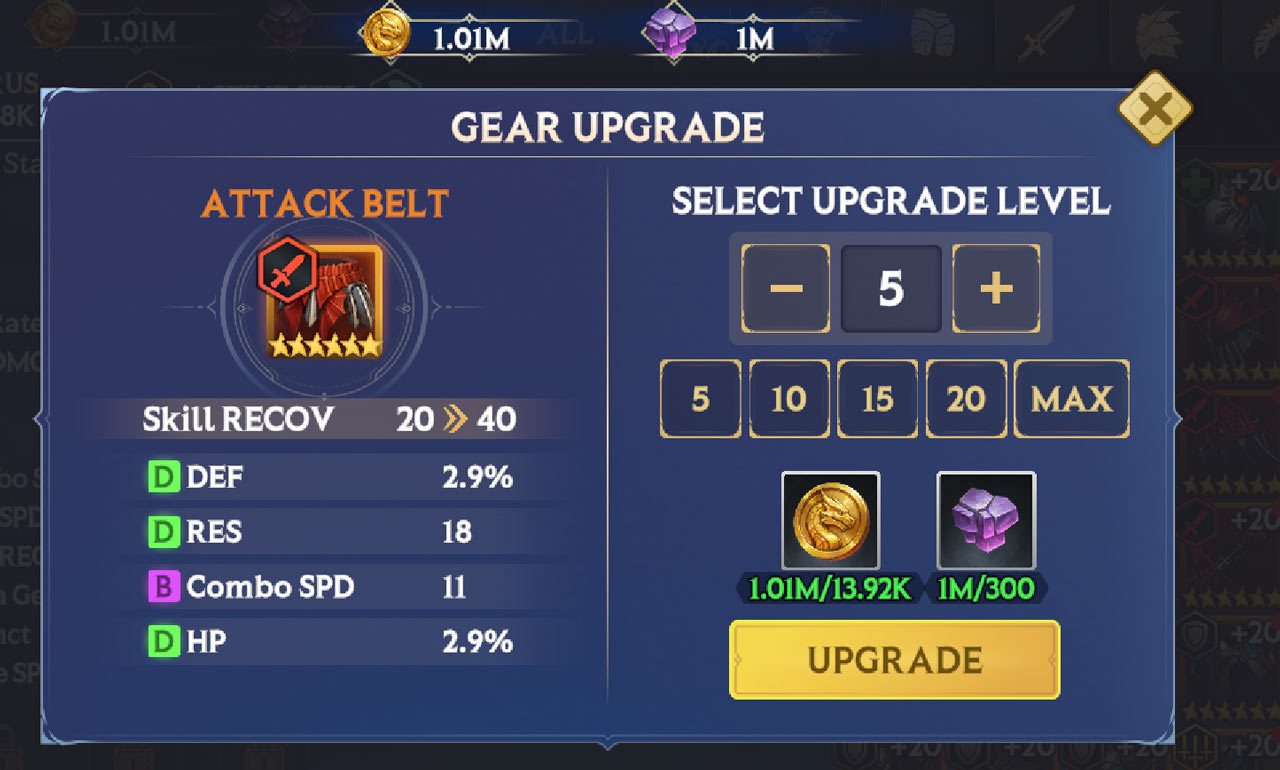
Upgrading Relics requires two resources: Gold and Memorium. Both
Gold and Memorium can be obtained from many sources but one of the major ways to get both is by selling or crushing unwanted Relics.
Stat Grades
Each Substat is given a Grade. This indicates the relative value of the Substat.
Substats start between Grade D to Grade B. The highest Grade of Substat is S. When unlocking a Substat, it can only start between Grades D to B.
The higher Rarity a Relic, the more chances you have to upgrade a Substat – as more Substats are unlocked from the start.
Legendary Relics can have up to 4 Substat upgrades
Epic Relics can have up to 3 Substat upgrades
Rare Relics can have up to 2 Substat upgrades
Uncommon Relics can have 1 Substat upgrades
Common Relics can never have Substat upgrades, as they need to unlock their Substats at Levels 5, 10, 15 and 20.
You need to unlock all Substats before they can be upgraded. Substats only unlock or upgrade at Levels 5, 10, 15 and 20. If Substats can be upgraded, the Substat to be upgraded is chosen at random.
When a Relic is created, a value of 70%, 80%, 90% or 100% is rolled to determine the strength of its initial Substats – with 100% meaning you get the max value a Substat could be at that level, and 70% being the minimum value. All roll %s are weighted equally.
At each following Substat upgrade threshold (Level 5, 10, 15 and 20), another value between 70% and 100% is rolled, determining the strength of the upgrade and being added onto your Substat's total "roll value".
It's your total roll value that determines the Substat's overall Grade. For example, you were at 280% after three rolls, your Substat Grade would be C.
You can see the overall Grade thresholds in the table below.
Roll Number | Total Roll Value | Grade |
0 (Initial Roll) | 70% | D |
0 (Initial Roll) | 90% | C |
0 (Initial Roll) | 100% | B |
1 (Level 5) | 140% | D |
1 (Level 5) | 150% | C |
1 (Level 5) | 170% | B |
1 (Level 5) | 190% | A |
2 (Level 10) | 210% | C |
2 (Level 10) | 240% | B |
2 (Level 10) | 260% | A |
2 (Level 10) | 300% | S |
3 (Level 15) | 280% | C |
3 (Level 15) | 310% | B |
3 (Level 15) | 330% | A |
3 (Level 15) | 370% | S |
4 (Level 20) | 350% | B |
4 (Level 20) | 380% | A |
4 (Level 20) | 430% | S |
The numbers to the left of a Substat indicate how many times it’s been upgraded.

Crushing and Selling Relics
If you are running out of space in your Relic Storage or want to recycle your old Relics, you can choose to either sell or crush them.
This can be done in one of two ways:
From the Gear Room
Directly from when you obtain a Relic
To sell or crush a single Relic, select the Relic you wish to sell or crush.
To sell, hit the option showing a stack of coins. To crush, hit the option showing a broken shield.
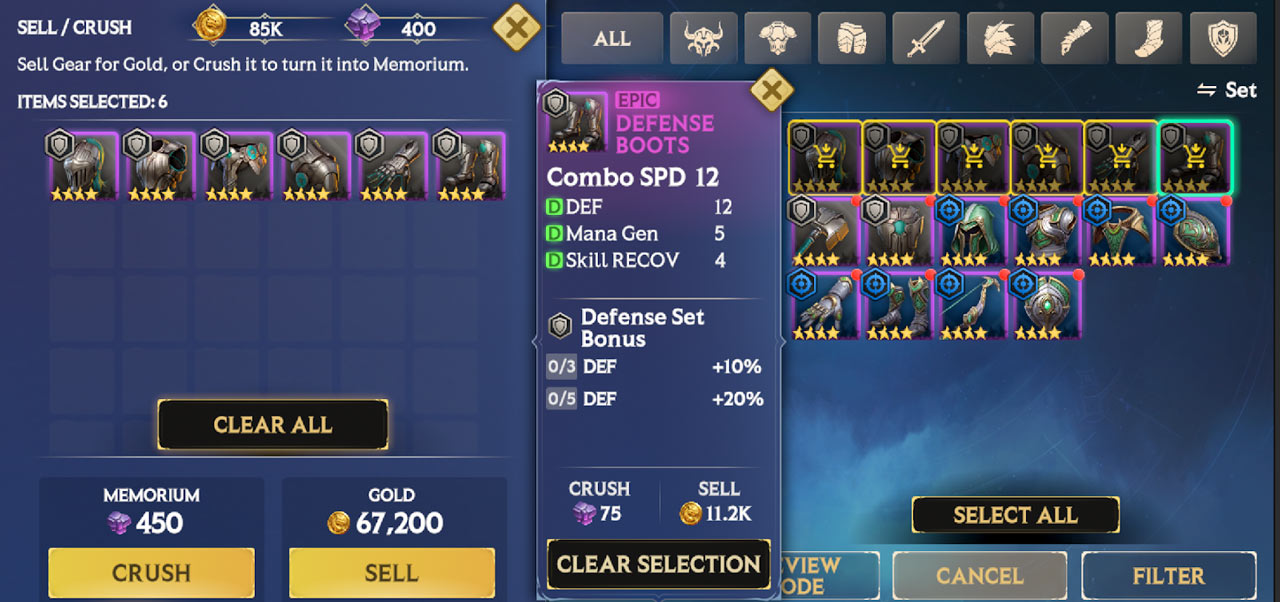
To sell or crush multiple Relics at once, hit the Sell / Crush option at the bottom right-hand corner of the screen.
You can select multiple Relics in your current Inventory, indicated by the shopping cart icon on each Relic.
Hit Select All to highlight all of the currently available Relics (based on your current Filter settings).
Once you’ve selected all of the Relics you wish to use, hit either the Sell or Crush button.
Relics can be sold or crushed directly from the Battle Results screen. Just tap on the Relics you wish to sell or crush, and you can decide right then and there.

You can also go directly to your Inventory from the Battle Results screen.
Relic Filtering
If you’re on the lookout for a really specific Relic with a particular Substat, you can use the Relic Filter to finetune your search.
To bring up the Relic Filter, hit the Filter button in the bottom right-hand corner of the Inventory.

Here, you can search by all manner of filters like Rarity, Rank, the specific Main or Substats on Relics, as well as the specific Type of Relic (Weapon, Pauldron, Shield etc.).
Once you’ve decided what to filter by, press the Close Filter option to go back to outfitting your Invokers.
Obtaining Relics
There are multiple places where you can obtain Relics. When you’re first starting out in the game, your main source of Relics will be via the Campaign.
Each Chapter of the Campaign specializes in a specific Relic Set, so you’ll need to grind specific Chapters to get the ones you want.
Within that, each Stage of a Chapter will drop a specific type of Relic: Helmets, Boots, Weapons and so on.
So if you specifically wanted to get Boots from the Attack Set for example, you’d need to head to Stage 7 of Chapter 2.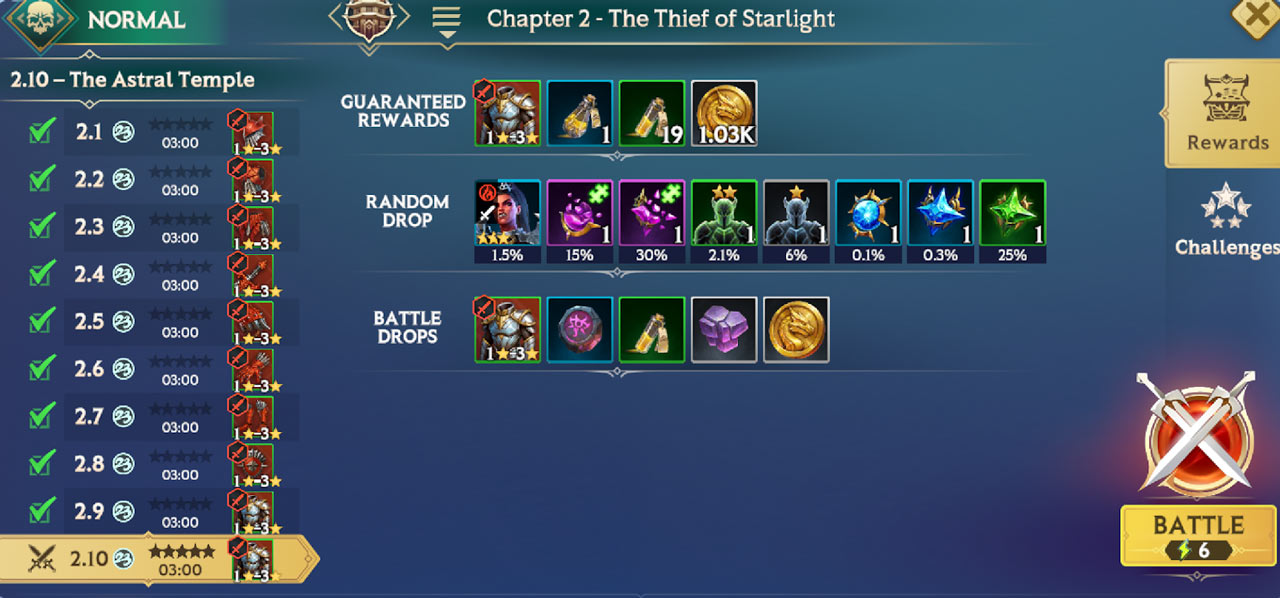
However, the Relics you get from the Campaign will only take you so far.
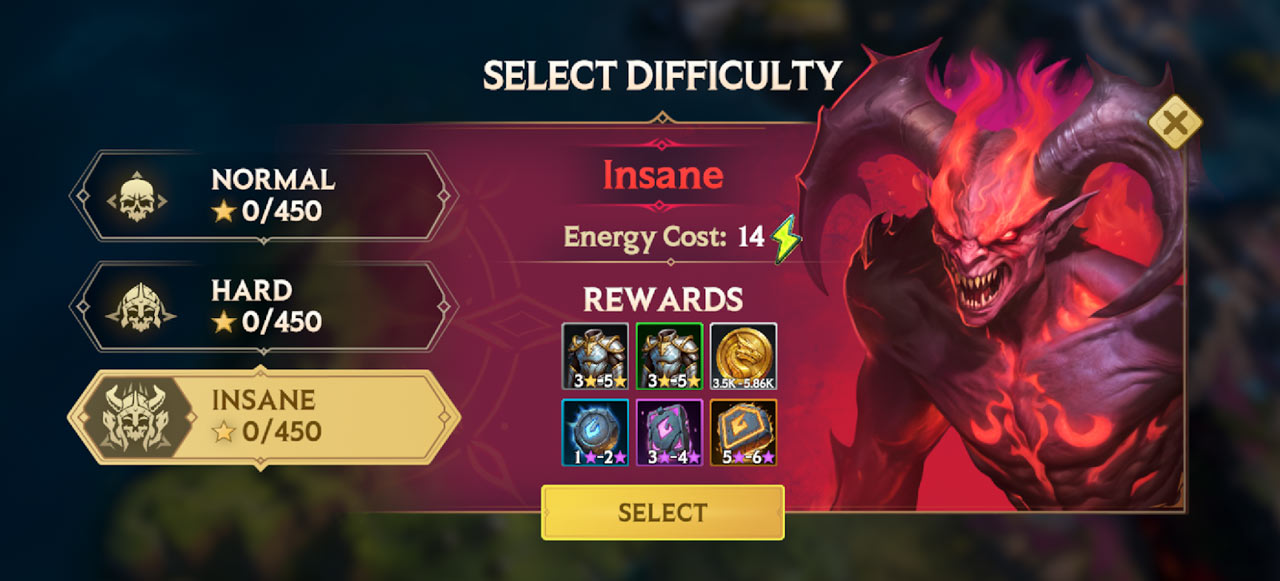
The max Rank of Relic you can get from the Campaign is 5★ on Insane
Can only gain Common or Uncommon Rarity Relics from the Campaign
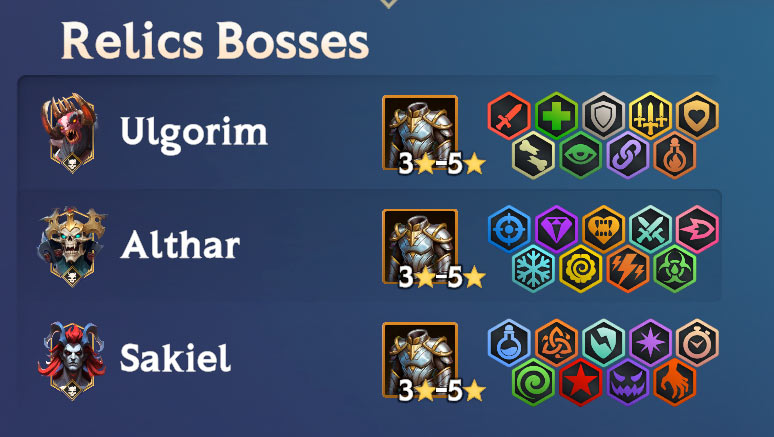
So if you really want to kit your Invokers out with the best Relics, you’ll need to take on the Relic Bosses in Boss Mode.
Relics dropped from these Bosses are guaranteed to be of 3★ or higher, and can be all the way up to Legendary Rarity.
The Relic Bosses also drop Relic Sets that aren’t obtainable anywhere else – ones that grant you Tolerances to powerful Corruptions, as well as boosts to multiple Stats.
For the full list of Relic Sets, check the Relic Set window, accessible by pressing the ? mark icon when checking your current active Set Bonus.
It will also give you a brief description of what each Relic Set is useful for – great for when you’re just starting out and trying to build your first Invokers.
Standard Relic Set
| STANDARD RELIC SETS | ||||
SET NAME | 3-PIECE BONUS | 5-PIECE BONUS | WHERE? | |
| GAIN | TOTAL | |||
| Health | HP +15% | HP +30% | HP +45% | Campaign: Chapter 1 Boss: Ulgorim the Horde King |
| Attack | ATK +10% | ATK +20% | ATK +30% | Campaign: Chapter 2 Boss: Ulgorim the Horde King |
| Defense | DEF +10% | DEF +20% | DEF +30% | Campaign: Chapter 3 Boss: Ulgorim the Horde King |
| Crit Rate | Crit Rate +10% | Crit Rate +20% | Crit Rate +30% | Campaign: Chapter 7 Boss: Ulgorim the Horde King |
| Crit Damage | Crit DMG +20% | Crit DMG +40% | Crit DMG +60% | Campaign: Chapter 8 Boss: Althar the Undead King |
| Accuracy | ACC +50 | ACC +75 | ACC +125 | Campaign: Chapter 4 Boss: Althar the Undead King |
| Resistance | RES +50 | RES +75 | RES +125 | Campaign: Chapter 6 Boss: Althar the Undead King |
| Mana | Mana Gen +30 | Mana Gen +45 | Mana Gen +75 | Campaign: Chapter 10 Boss: Sakiel the Fallen Angel |
| Instinct | Instinct +30 | Instinct +45 | Instinct +75 | Campaign: Chapter 9 Boss: Sakiel the Fallen Angel |
| ADVANCED RELIC SETS | |||||
SET NAME | 3-PIECE BONUS | 5-PIECE BONUS | WHERE? | ||
| GAIN | TOTAL | ||||
| Voodoo | Buff Reduction -1s
| Buff Reduction -2s | Buff Reduction -3s | Boss: Sakiel the Fallen Angel | |
| Vampire | ATK +10% | Lifesteal (Skills) +6% Lifesteal (Combo) +1%
| Campaign: Chapter 5
| ||
| Spark | Skill SPD +30 | Skill SPD +45 | Skill SPD +75 | Campaign: Chapter 11 Boss: Althar the Undead King | |
| Fury | Skill RECOV +30 | Skill RECOV +45 | Skill RECOV +75 | Campaign: Chapter 12
| |
| Predator | ATK +10% | Crit DMG +40% | Boss: Sakiel the Fallen Angel | ||
| Paragon | Shield & Heal Size +15%
| Ally Move SPD +3m/s
| Boss: Ulgorim the Horde King | ||
| Crush Tolerance | Crush Tolerance +50% Increases effectiveness versus Bosses with Crush Corruption: Omnissi (Astral), Hyxxis, Althar | HP +20% ATK +20% DEF +20% | Boss: Ulgorim the Horde King | ||
| Manashock Tolerance | Manashock Tolerance +50% Increases effectiveness versus Bosses with Manashock Corruption: Omnissi (Dark), Koltmos, Sakiel | HP +20% ATK +20% DEF +20% | Boss: Althar the Undead King | ||
| Frost Tolerance | Frost Tolerance +50% Increases effectiveness versus Bosses with Frost Corruption: Omnissi (Water), Yskara | HP +20% ATK +20% DEF +20% | Boss: Althar the Undead King | ||
| Daze Tolerance | Daze Tolerance +50% Increases effectiveness versus Bosses with Daze Corruption: Omnissi (Fire), Ulgorim, Galvos | HP +20% ATK +20% DEF +20% | Boss: Sakiel the Fallen Angel | ||
| Paralysis Tolerance | Paralysis Tolerance +50% Increases effectiveness versus Bosses with Paralysis Corruption: Omnissi (Earth), Omnissi (Light) | HP +20% ATK +20% DEF +20% | Boss: Ulgorim the Horde King | ||
| Nightmare Tolerance | Nightmare Tolerance +50% Increases effectiveness versus Bosses with Nightmare Corruption: Omnissi (Wind), Pentiax | HP +20% ATK +20% DEF +20% | Boss: Sakiel the Fallen Angel | ||
| Mindfog Tolerance | Mindfog Tolerance +50% Increases effectiveness versus Bosses with Mindfog Corruption: Omnissi (Water), Pentiax | HP +20% ATK +20% DEF +20% | Boss: Althar the Undead King | ||
| Fatigue Tolerance | Fatigue Tolerance +50% Increases effectiveness versus Bosses with Fatigue Corruption: Omnissi (Wind), Yskara, Althar | HP +20% ATK +20% DEF +20% | Boss: Ulgorim the Horde King | ||
| Blight Tolerance | Blight Tolerance +50% Increases effectiveness versus Bosses with Blight Corruption: Omnissi (Light), Ulgorim, Koltmos | HP +20% ATK +20% DEF +20% | Boss: Sakiel the Fallen Angel | ||
| Manaburn Tolerance | Manaburn Tolerance +50% Increases effectiveness versus Bosses with Manaburn Corruption: Omnissi (Fire), Omnissi (Dark), Hyxxis | HP +20% ATK +20% DEF +20% | Boss: Ulgorim the Horde King | ||
| Atrophy Tolerance | Atrophy Tolerance +50% Increases effectiveness versus Bosses with Atrophy Corruption: Omnissi (Astral), Galvos | HP +20% ATK +20% DEF +20% | Boss: Sakiel the Fallen Angel | ||
| Bloodrot Tolerance | Bloodrot Tolerance +50% Increases effectiveness versus Bosses with Bloodrot Corruption: Omnissi (Earth), Sakiel | HP +20% ATK +20% DEF +20% | Boss: Althar the Undead King | ||