Need to know how Skills work in Invokers: Titan Legacy? Become a Skill master with our helpful guide!
Each Invoker has a unique set of Skills – allowing them to attack enemies, heal allies, place buffs and debuffs and a whole lot more.
There are 5 broad types of Skills, each with their own unique properties.

Combo Attacks
Combo Attacks have no cooldown and cycle through 5 specific attacks.
The 5th Combo Attack acts as a sort of “finisher”, usually with an added effect like hitting as an AOE attack or doing additional damage.
Once you perform the 5th Combo Attack, your Invoker will loop back to the 1st Combo Attack.
Combo Attacks are the main way you generate both Titan and Ultimate Mana.
Legendary Invokers have unique properties on their 5th Combo Attack, like the ability to extend or reduce cooldowns, heal themselves and so on.

Active Skills
Each Invoker has 3 Active Skills. Active Skills have cooldowns, meaning you have to wait for them to recharge before you can use them again.
By fine tuning your Skill SPD, Skill RECOV and Mana Gen stats, you can be throwing out Skills left and right. To find out how to create this Skill snowball effect, check out our Stats guide.
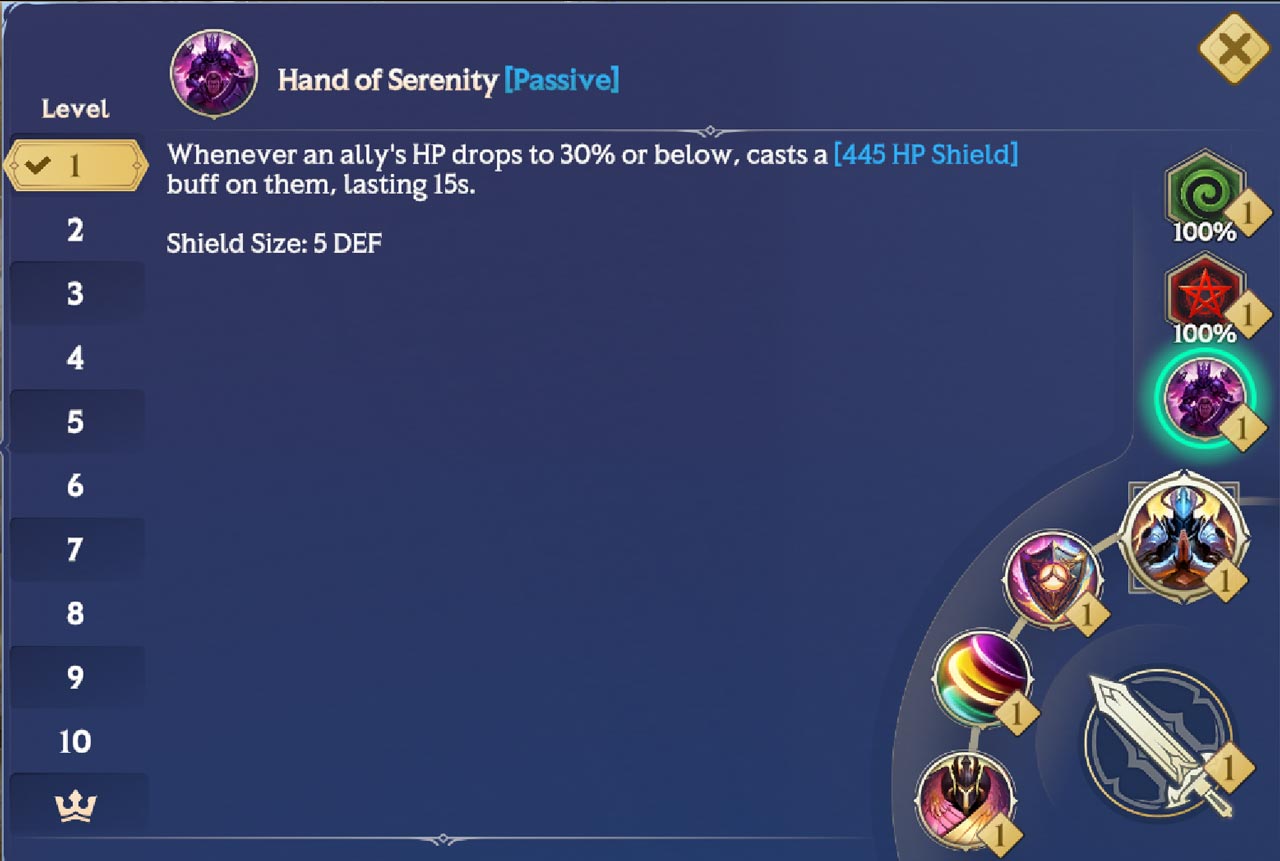
Passive Skills
Like Bosses, some Invokers have access to powerful Passive Skills.
Passive Skills are not activated manually. Instead, they run in the background or activate when certain conditions are met.
If an Invoker with a Passive Skill that affects other Invokers’ Stats falls in battle, that Passive stops working.
Tolerances
Tolerances mitigate the negative effects inflicted by Corruptions.
Each Invoker has one or two innate Tolerances, depending on their Rarity:
Common, Uncommon, and Rare Invokers each have one Tolerance.
Epic and Legendary Invokers have two Tolerances.
Check our full Corruptions and Tolerance guide for more information.
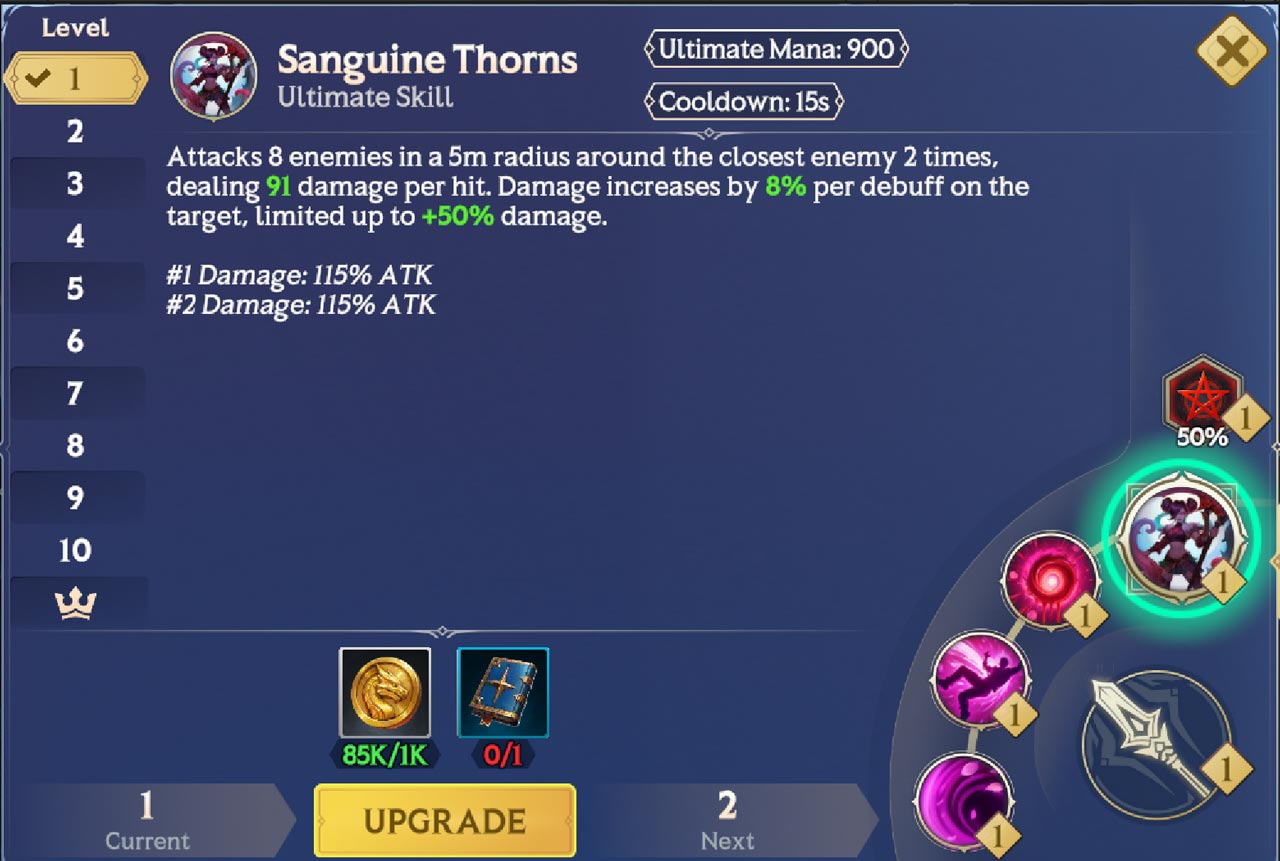
Ultimates
Each Invoker has an Ultimate Skill – consider it as their signature move.
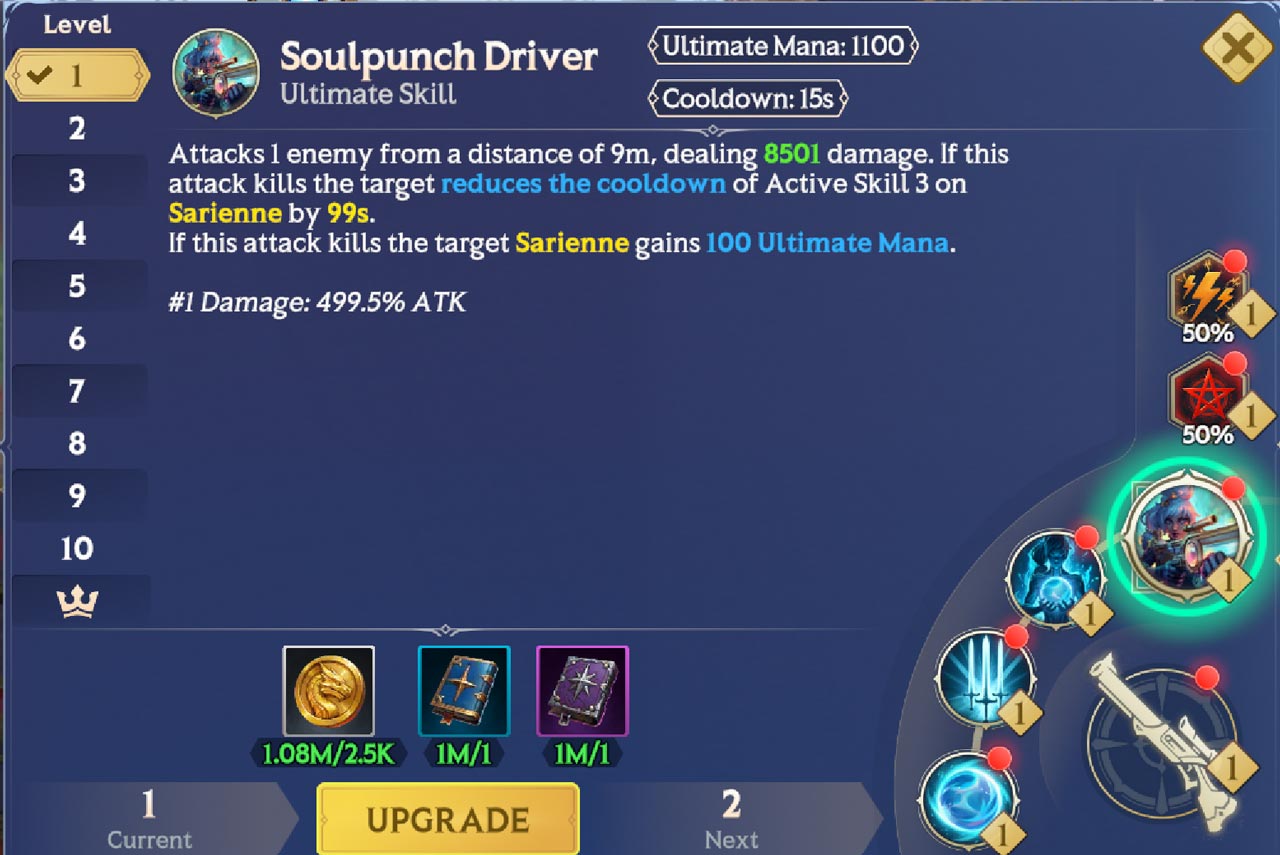
Unlike Active Skills, you have to build up Ultimate Mana to cast one of these powerful abilities.
You generate Ultimate Mana by landing Combo Attacks and Active Skills. You can increase the rate you generate Ultimate Mana by boosting your Mana Gen Stat.
The amount of Ultimate Mana needs to cast an Ultimate is shown at the top, above the Skill’s cooldown.
Upgrading Ultimate Skills will also reduce the amount of Ultimate Mana you need to cast them.
Important! Unlike Titan Mana, there is no Ultimate Mana overflow. Once you’ve reached 100% Ultimate Mana, you cannot gain any more until you use your Ultimate. Use it or lose it!
Upgrading Skills
An Invoker’s Combo Attacks, Active Skills, Passive Skills, Ultimate and Tolerances can all be upgraded with Codexes. This makes them stronger – usually increasing the damage they deal, decreasing their base cooldowns, or increasing the potency of their buffs and debuffs.
There are three types of Codexes – Rare, Epic, and Legendary.
Upgrading Skills to higher levels requires a combination of different Rarity Codexes
You can earn Codexes by completing Quests, climbing the Spires, and more – including from the Shop
You can receive a Rare Codex every day through the daily Playtime Rewards
Understanding Skill Descriptions
There are lots of moving parts to a Skill, so it really helps to know how to read a Skill description and figure out what it does at a quick glance.
Higher Rarity Champions tend to have more complex and powerful Skills, so having the ability to quickly tell the utility of a particular Skill is very important.
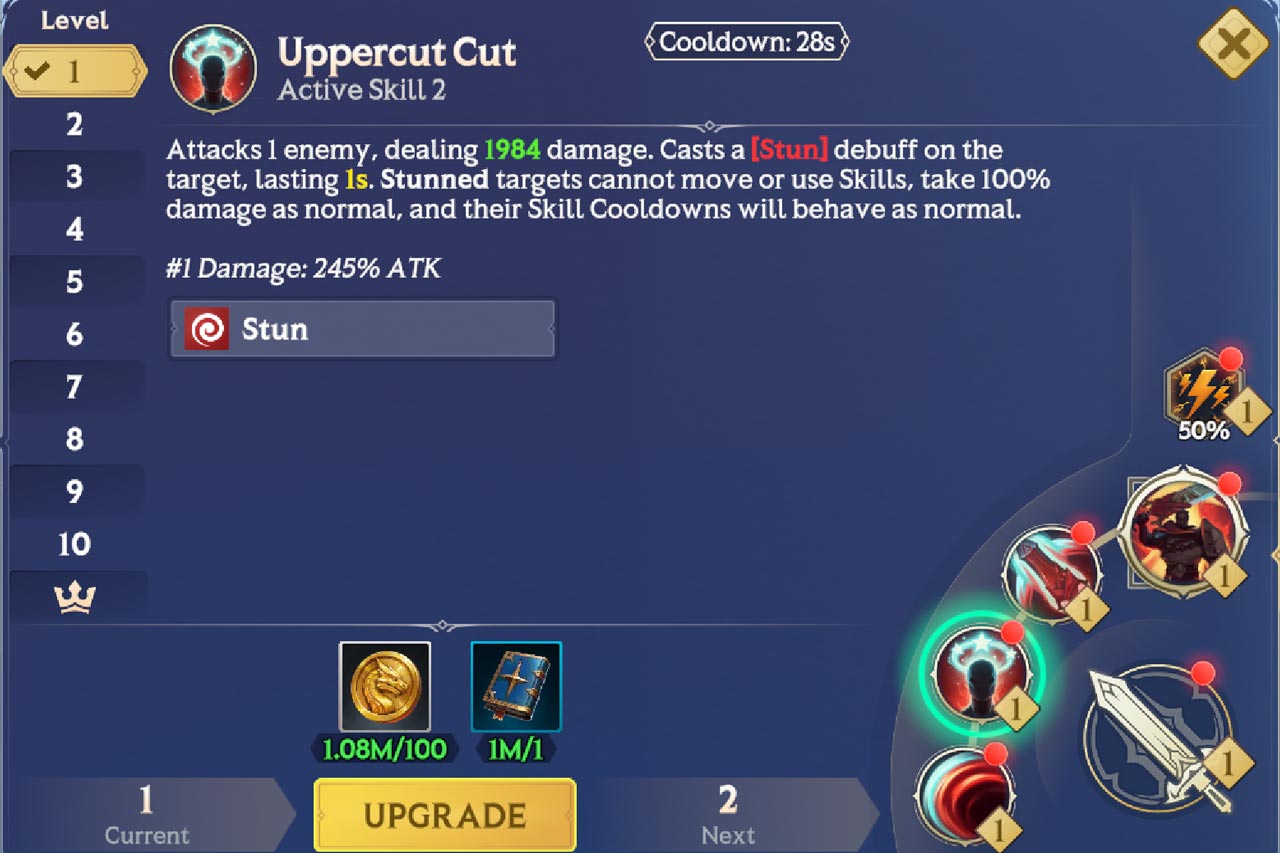
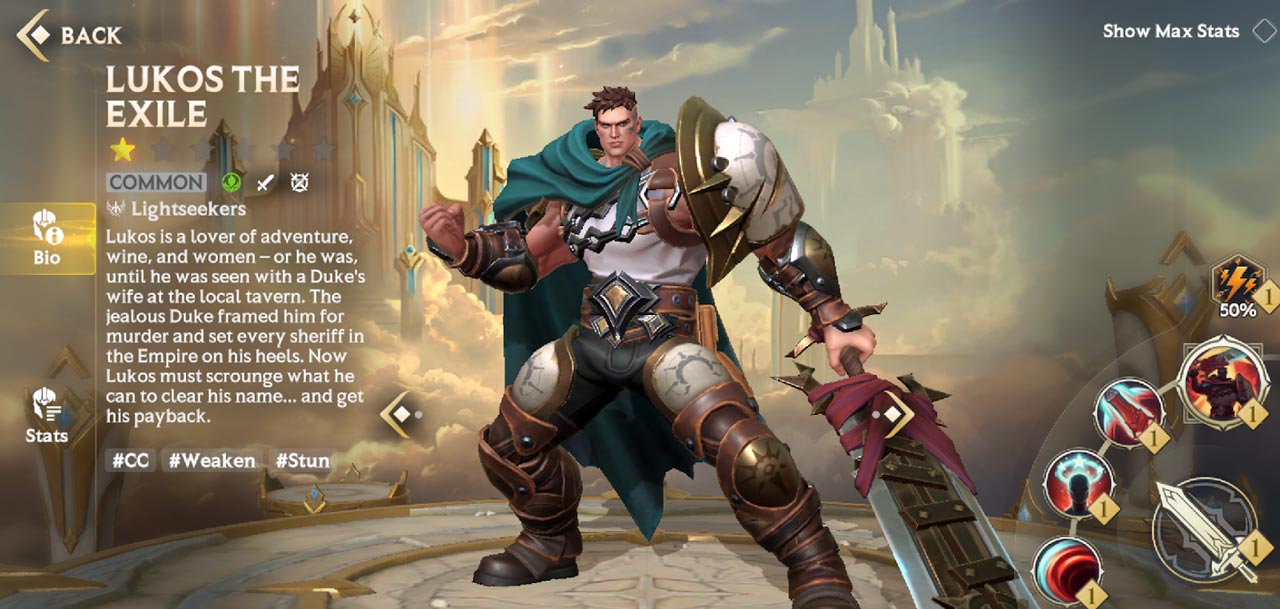
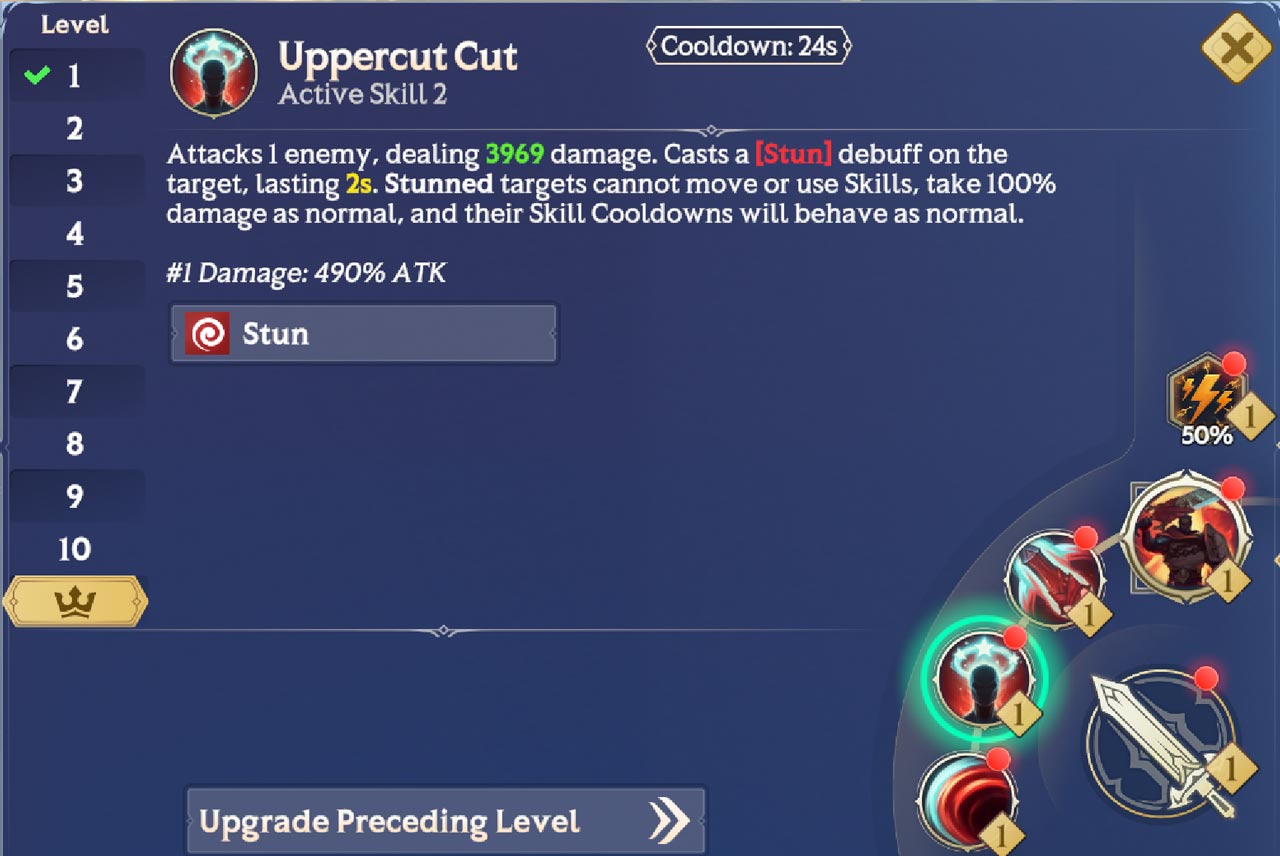
This is the second skill of the Common Invoker, Lukos the Exile. At the very top, we see the Skill’s cooldown. This is its base cooldown, and this will generally decrease as you upgrade the Skill.
Next, we have the main Skill text. It’s an attack that hits 1 enemy, dealing damage and casting a 1 second Stun debuff.
The damage number in green is determined by the modifier at the bottom of the description.
The damage is calculated based on 245% of Lukos’ ATK Stat. This number will change based on the ATK Stat of your Lukos
All Skills have a 10% random damage variance when cast – meaning they could deal 95% damage, or 105% damage!
Also keep in mind that the enemy’s DEF stat will also affect the actual damage the Skill will do in a Battle.
Stun is written in red and has square brackets around it. In general, red text means it applies to the enemy and will apply a negative effect to them like a debuff, extending their cooldowns, stealing a buff and so on.
Buffs and other positive effects like cooldown reductions are written in blue.
If a word in blue or red has square brackets, that means it’s a buff or debuff.
If it doesn’t have square brackets, it’s an instant effect.
For negative effects, Accuracy and Resistance factor into whether the debuff or effect actually happens.
For positive effects, they are always applied (unless affected by other factors like a Heal Reduction or a Block Revive debuff). The exception is Pushes, Pulls and Launches – they are subject to Accuracy and Resistance rolls.
As for the yellow 1 second, that is a general indicator of importance – either to indicate an action, a time duration (that will usually change), or the main subject of a particular Skill effect.
In this Skill, it’s to highlight the Stun duration
Now let’s look at the Skill fully upgraded and see what’s changed.
The Skill’s base cooldown has been lowered by 4 seconds
The damage modifier has been doubled, meaning our green damage number has also doubled
The Stun duration has also doubled
Upgrading Skills can take something that seems mediocre at first glance, to something that can be very useful in battle.
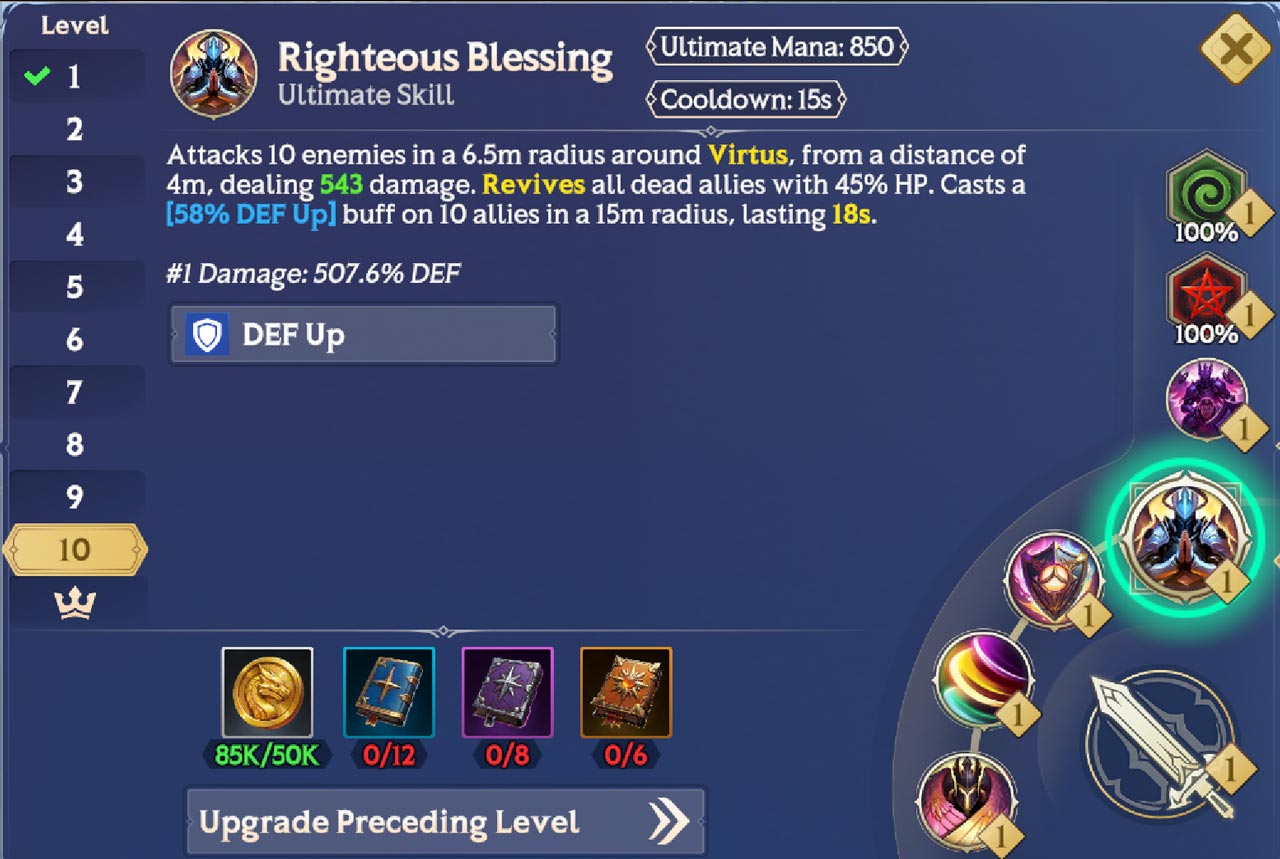
Let’s look at a healing Skill from a Rare Invoker and use what we’ve learned so far.
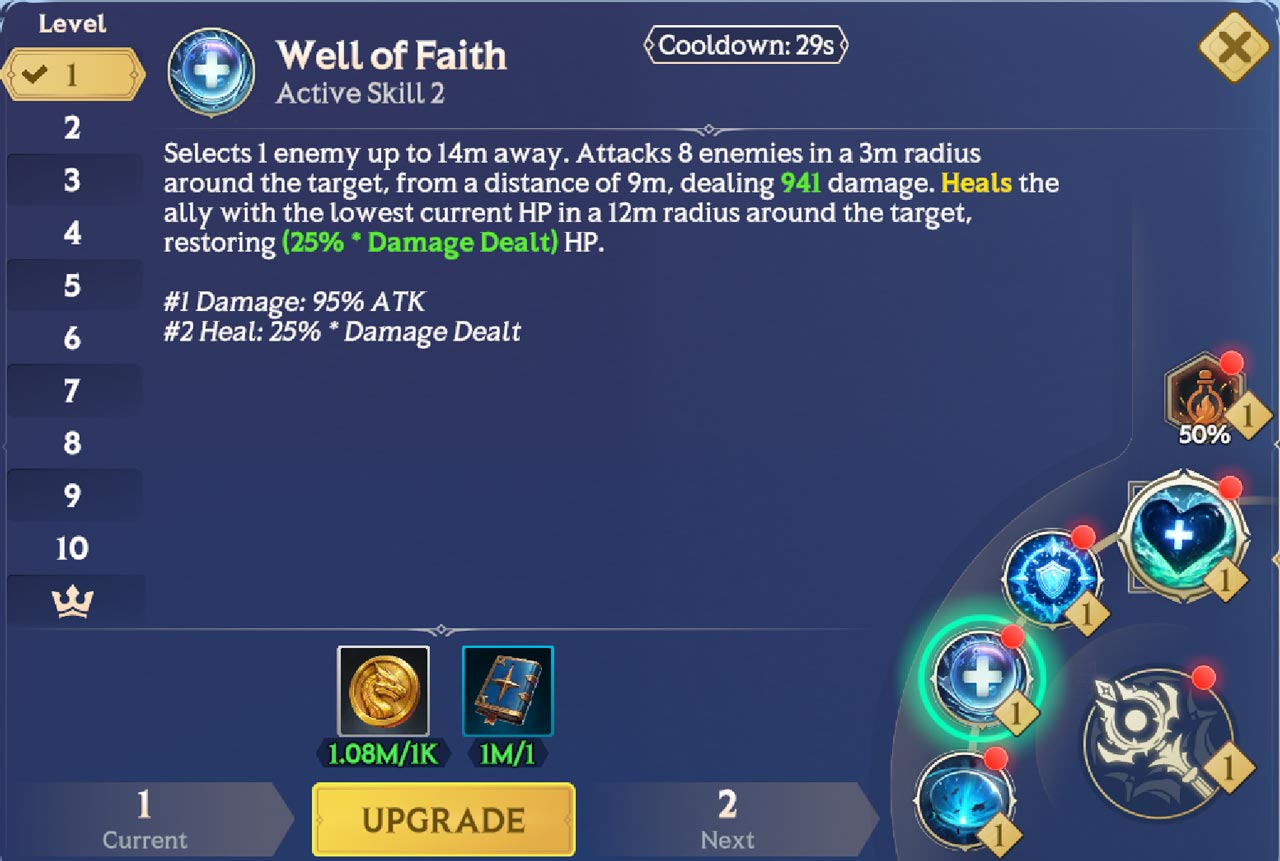
This is the second Skill of Arissa, a powerful healer you’ll receive as part of the game’s New Player Rewards path.
In this instance, it’s an attack that targets an enemy 14m away from Arissa, and then deals damage to up to 8 enemies who are in a 3m radius around that initial target (including the target itself).
To understand how everything fits together, let’s go through the words in color.
1st green damage number – the Skill’s damage. It’s determined by 95% of Arissa’s ATK.
2nd green damage number – how much the Skill heals. It’s determined by 25% of the damage dealt by the Skill
In the example, if the Skill dealt 941 damage, it would heal for 235 HP
It doesn’t give a number in this Skill description, as the first part of the Skill needs to go through enemy damage mitigation to calculate the exact value of the heal
Yellow – the word Heals. The value of the heal will increase as the Skill gets upgraded (as the Skill will deal more damage)
Time to kick it up a notch with a Skill from an Epic Invoker, Rikharel the Seascale.
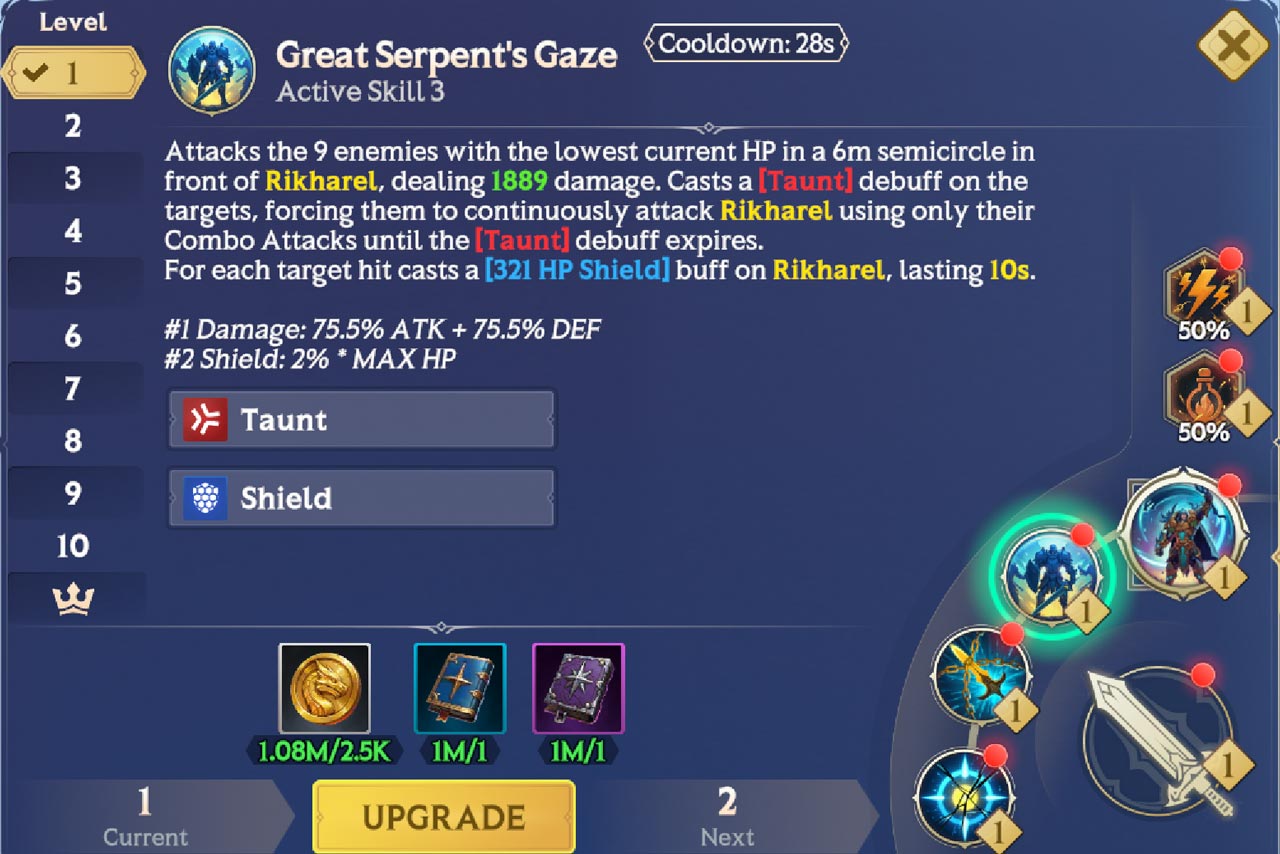
So we’ve got text of every color here – yellow, green, red, and blue. Let’s go through to understand everything.
Yellow – Rikharel himself, indicating he’s where the attack originates, is the subject of the Taunt debuff and the recipient of the Shield buff.
It also indicates the length of the Shield buff on Rikharel. This will increase as the Skill is upgraded.
Green – the Skill’s damage. It’s determined by 75.5% of Rikharel’s ATK + 75.5% of Rikharel’s DEF
Red – The debuff this Skill applies (Taunt)
Blue – The buff this Skill applies (a Shield to Rikharel himself)
The second modifier also tells us that the Shield is based on 2% of Rikharel’s MAX HP. As the Skill is upgraded, this modifier will increase
Boss Skills work in exactly the same way – so use this method to understand exactly what they do too!